luch said:only time will tell. and fingers crossed
No need to cross your fingers as Newmarket is next to Aurora where Menace resides

luch said:only time will tell. and fingers crossed
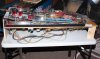
Thanks dude. I was thinking of making some sort of rotisserie thing myself, but maybe something more table-topish. But if that proves too difficult/expensive, I may take you up on that offer.mwong168 said:Good stuff Tim, if you want I have a home made playfield rotisserie you can borrow to make your shop job easier. It's similar to this and I bought it off Terry (rockinganker) a few months ago.
viewtopic.php?f=4&t=169
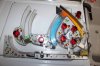
Right? I spent so much time on them I was worried I'd hit wood.Grauwulf said:I don't know, but it sure looks like you got her tits nice and squeaky clean!