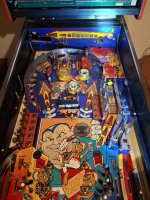
I thought I would share a little of the Mousin' Around! progress since I got the game in December.
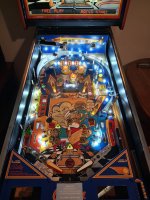
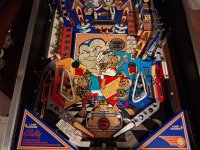
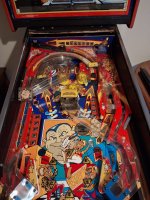
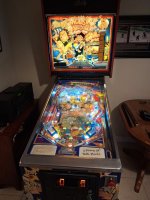
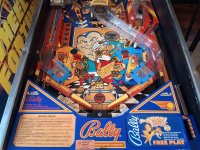
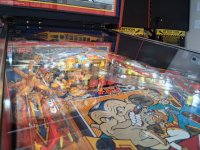
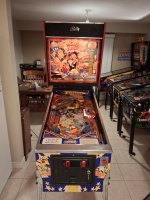
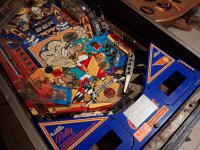
The game is playing great! Bright and colourful with fun sounds and callouts. Another terrific System 11 era game from Bally/Williams.
This game had not been played in about ten years when I got it. Owners had it for close to 20 years, but when something broke, they didn't know what to do or where to go for help. Eventually they just wanted it gone and so with some luck in seeing the for sale ad as quickly as I did, it came to me.
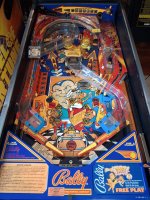
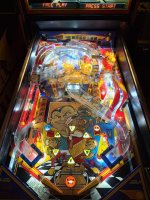
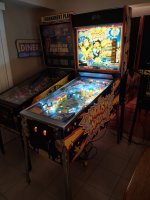
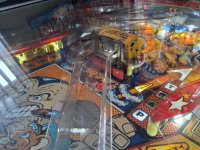
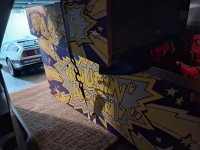
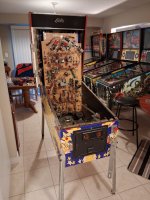
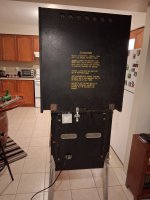
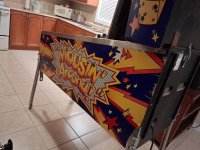
The playfield was pretty dirty, but otherwise in nice shape. Not really much wear to speak of. A small amount at a couple of the spots where the ball comes down from the ramps, but that's about it. Cabinet is so-so. Decals are pretty faded on one side, but not too bad on the other. Backbox portion has a few bumps and bruises, one of those being the original clasp seems to have been pulled right out of the wood. Another clasp was mounted beside the original spot. The side rails got dinged when the backbox must have come down hard at some point. Doesn't look great, but isn't affecting anything other than cosmetics.
The translite is in nice shape. I put new trim on all four sides along with a new lock for the backbox. Displays work well, although the right side one sits lower than it should and isn't in full view through the clear area of the translite. Not the end of the world for now, or ever maybe. The batteries that were in the game were dated January 2005, so long ago had gone out. They didn't leak, thankfully, but upon removal, the battery holder let go of the small piece of ceramic that contacts the top of each battery. I got it all working with new batteries now. Programming buttons initially were not super responsive, but eventually came to work properly after exercising them.
The slam tilt switch works and was initially too close together and caused a couple of resets. That didn't take long to realize and so the switch ends are bent out of the way of each other as most of these switches are on home games. Coin mechs were there and work fine. Coin tray was included as well. Tilt plumb Bob works although it was rolling around inside the cabinet when I first opened it up. Believe it or not, the previous owners didn't know how to remove the glass or work on the game.
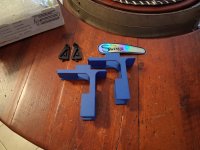
And with that in mind, the rubber tip for the shooter had long ago fallen off. Continuing to play the game led to a mushroomed shooter rod tip. Yikes! It wouldn't come out of the housing because of this. I wanted to put a nicer translucent red shooter rod in anyway, so bought a new shooter housing for it and just replaced the entire assembly instead of trying to take a hacksaw to the mushroomed rod to get it apart.
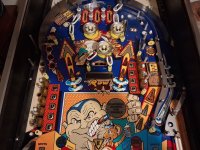
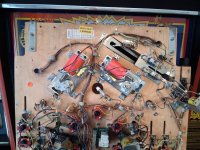
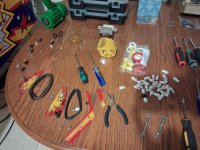
All rubber rings and post sleeves replaced with new as well as all bulbs changed to LEDs. Backbox, playfield GI and inserts. I removed all the plastics and the ramps and cleaned each one. I actually put most of the plastics in the kitchen sink and cleaned with dish soap! Saw another guy on the Mousin' Around! forum do this with great results and he was right. It won't help for yellowed or chipped plastics, but was really good at cleaning off filth. Only one plastic has a crack in it. The right slingshot. It's taped back together and is fine that way until I decide to get a new one.
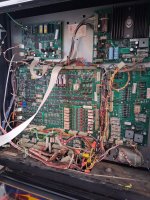
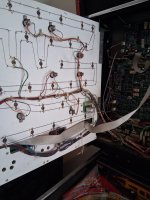
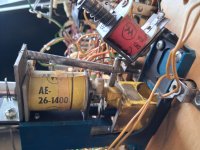
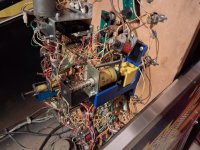
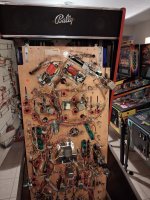
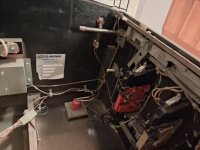
The interconnect board is working but not pretty. At least one connector must have gotten toasty and was completely removed and the leads soldered directly to the board. Those wire ends are then muretted together with the cabinet wiring. Interconnect boards are available thankfully, so I may get one to clean that whole mess up.
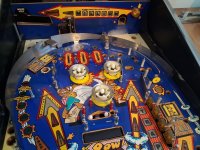
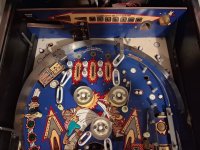
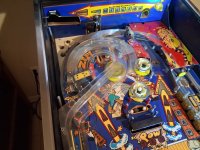
The ramps are decent. A little cloudy, but generally not cracked or chipped anywhere. Exception is the centre ramp has one of the mounting eyes cracked off, so some repairs are needed there. Again, those ramps are available for purchase at a couple of the main vendors.
It has some odd flipper bats in it when I got it so I put the correct yellow ribbed ones in. They might play a little too long though, so may go back to regular length ones. The coils underneath were so-so, but needed a rebuild. Sleeves wouldn't come out, so decided to put new assemblies in on both sides. Flippers are great now.
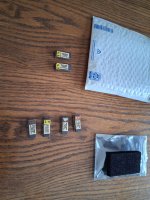
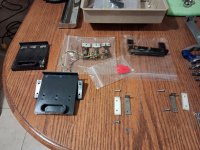
Recently got my Cliffy order in of new ball frames. This to eliminate any ball hop at the flipper inlanes from deformed metal. Surprisingly, Cliff must have had these in stock, or it was just an easy one to get out the door, as they arrived only about 10 days after I asked him for them. His wait times can be up to two months from what I hear.
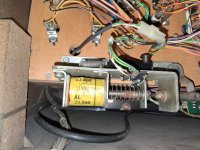
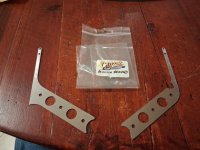
Last thing that just came in the mail yesterday were replacement ball eater brackets from a guy in Australia. He 3D prints these strenghtened replacements. My right side ball trap bracket has a crack in it, so wanted to replace it proactively. Also got a replacement flat cam for the diverter at the back of the game. This diverter took some fiddling and cleaning to get working well, which it is now, so the flat cam can just be a spare for the time being.
Anyway, I think that's about it. New leg bolts, leg levellers and leg protectors too. I swapped in an old set of legs I had, which aren't perfect, but are better than the ones it came with. Same with the playfield glass. I had a good spare piece that went in and the piece that came with it went in the trash. Oh, new ROMs from Dave Astill which included the 5.0 Soren code with some improvements in it. Speakers all work well and volume adjustment knob is fine too.
Mostly just able to play the game now. Quite the game to bring home for what I thought had to have been a typo when I saw the ad. I suspect this is the game I'll bring to Wasaga in May if anyone is interested in playing it.
The game is playing great! Bright and colourful with fun sounds and callouts. Another terrific System 11 era game from Bally/Williams.
This game had not been played in about ten years when I got it. Owners had it for close to 20 years, but when something broke, they didn't know what to do or where to go for help. Eventually they just wanted it gone and so with some luck in seeing the for sale ad as quickly as I did, it came to me.
The playfield was pretty dirty, but otherwise in nice shape. Not really much wear to speak of. A small amount at a couple of the spots where the ball comes down from the ramps, but that's about it. Cabinet is so-so. Decals are pretty faded on one side, but not too bad on the other. Backbox portion has a few bumps and bruises, one of those being the original clasp seems to have been pulled right out of the wood. Another clasp was mounted beside the original spot. The side rails got dinged when the backbox must have come down hard at some point. Doesn't look great, but isn't affecting anything other than cosmetics.
The translite is in nice shape. I put new trim on all four sides along with a new lock for the backbox. Displays work well, although the right side one sits lower than it should and isn't in full view through the clear area of the translite. Not the end of the world for now, or ever maybe. The batteries that were in the game were dated January 2005, so long ago had gone out. They didn't leak, thankfully, but upon removal, the battery holder let go of the small piece of ceramic that contacts the top of each battery. I got it all working with new batteries now. Programming buttons initially were not super responsive, but eventually came to work properly after exercising them.
The slam tilt switch works and was initially too close together and caused a couple of resets. That didn't take long to realize and so the switch ends are bent out of the way of each other as most of these switches are on home games. Coin mechs were there and work fine. Coin tray was included as well. Tilt plumb Bob works although it was rolling around inside the cabinet when I first opened it up. Believe it or not, the previous owners didn't know how to remove the glass or work on the game.
And with that in mind, the rubber tip for the shooter had long ago fallen off. Continuing to play the game led to a mushroomed shooter rod tip. Yikes! It wouldn't come out of the housing because of this. I wanted to put a nicer translucent red shooter rod in anyway, so bought a new shooter housing for it and just replaced the entire assembly instead of trying to take a hacksaw to the mushroomed rod to get it apart.
All rubber rings and post sleeves replaced with new as well as all bulbs changed to LEDs. Backbox, playfield GI and inserts. I removed all the plastics and the ramps and cleaned each one. I actually put most of the plastics in the kitchen sink and cleaned with dish soap! Saw another guy on the Mousin' Around! forum do this with great results and he was right. It won't help for yellowed or chipped plastics, but was really good at cleaning off filth. Only one plastic has a crack in it. The right slingshot. It's taped back together and is fine that way until I decide to get a new one.
The interconnect board is working but not pretty. At least one connector must have gotten toasty and was completely removed and the leads soldered directly to the board. Those wire ends are then muretted together with the cabinet wiring. Interconnect boards are available thankfully, so I may get one to clean that whole mess up.
The ramps are decent. A little cloudy, but generally not cracked or chipped anywhere. Exception is the centre ramp has one of the mounting eyes cracked off, so some repairs are needed there. Again, those ramps are available for purchase at a couple of the main vendors.
It has some odd flipper bats in it when I got it so I put the correct yellow ribbed ones in. They might play a little too long though, so may go back to regular length ones. The coils underneath were so-so, but needed a rebuild. Sleeves wouldn't come out, so decided to put new assemblies in on both sides. Flippers are great now.
Recently got my Cliffy order in of new ball frames. This to eliminate any ball hop at the flipper inlanes from deformed metal. Surprisingly, Cliff must have had these in stock, or it was just an easy one to get out the door, as they arrived only about 10 days after I asked him for them. His wait times can be up to two months from what I hear.
Last thing that just came in the mail yesterday were replacement ball eater brackets from a guy in Australia. He 3D prints these strenghtened replacements. My right side ball trap bracket has a crack in it, so wanted to replace it proactively. Also got a replacement flat cam for the diverter at the back of the game. This diverter took some fiddling and cleaning to get working well, which it is now, so the flat cam can just be a spare for the time being.
Anyway, I think that's about it. New leg bolts, leg levellers and leg protectors too. I swapped in an old set of legs I had, which aren't perfect, but are better than the ones it came with. Same with the playfield glass. I had a good spare piece that went in and the piece that came with it went in the trash. Oh, new ROMs from Dave Astill which included the 5.0 Soren code with some improvements in it. Speakers all work well and volume adjustment knob is fine too.
Mostly just able to play the game now. Quite the game to bring home for what I thought had to have been a typo when I saw the ad. I suspect this is the game I'll bring to Wasaga in May if anyone is interested in playing it.
Attachments
-
 20251215_213418.jpg149.9 KB · Views: 24
 -
 20251216_163715.jpg169.4 KB · Views: 20
 -
 20251216_163729.jpg202.7 KB · Views: 17
 -
 20251216_163820.jpg115.1 KB · Views: 19
 -
 20251216_163857.jpg107.3 KB · Views: 14
 -
 20251216_163920.jpg150.9 KB · Views: 15
 -
 20251216_191229.jpg166.6 KB · Views: 16
 -
 20251217_205346.jpg179.7 KB · Views: 18
 -
 20251217_205403.jpg221 KB · Views: 15
 -
 20251217_211156.jpg187.7 KB · Views: 17