• We have upgaded to the latest version of XenForum and the process finished without any errors!!!! Enjoy the new forum!

Tim's JOKERZ! thread

tim.sanderson

Active Member
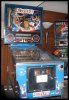
That's right, it's finally home!! Talk about an exercise in aligning schedules. :FP: I wound up borrowing my dad's SUV and paying the neighbor-kid to come along to help load/unload the machine.

I don't know if it's because the machine is a bit lighter than my R911, or because I've learned from my mistakes taking my first machine down the stairs, but this time was considerably easier.

Hopefully I'll get a bunch of pics taken/uploaded during next few hours. So exciting! I can't wait to dig in!!
 

Attachments

  • jokerz at home.jpg
    jokerz at home.jpg
    120.6 KB · Views: 3,156

tim.sanderson

Active Member
I've only got so much time before I head out for work, but here are a few photos of the machine:
I took of the ramps, started cleaning a bit, but couldn't resist the urge to power it up. I didn't fasten them down, but I did put the ramps in place. I also had to replace the plug on it first. The original one was cut off the machine because apparently it was in too nasty a shape to use. The seller was kind enough to supply me with a new one.

The playfield is in surprisingly good shape due to what looks like factory installed Mylar. You can notice a slight colour change between the parts that are Mylar'd and the parts that aren't. I haven't really noticed any bad wear spots. The Mylar hasn't even started lifting too badly. There are some spots above inserts that can be heard crackling when I run my hand over the top of it, but you can't see it with the naked eye.

I'll take lots more pics and maybe a 'video tour' of the machine this evening.

This link won't work until at least after 10 this morning, but it shows the game after I booted it up.

http://youtu.be/vtGW5FKQOc8
 

Attachments

  • IMG_0040.JPG
    IMG_0040.JPG
    188.2 KB · Views: 3,099
  • IMG_0045.JPG
    IMG_0045.JPG
    146.2 KB · Views: 3,098
  • IMG_0046.JPG
    IMG_0046.JPG
    118.7 KB · Views: 3,098
  • IMG_0048.JPG
    IMG_0048.JPG
    142.5 KB · Views: 3,099
  • IMG_0053.JPG
    IMG_0053.JPG
    168.6 KB · Views: 3,098

bstock

Active Member
Apr 1, 2013
325
48
28
Montreal, Quebec
That's a hilarious video Tim! Ramps floppin' all over the place, flashers not secured. I laughed out loud at the "SHIT forgot about that...". Great entertainment. Looks like a nice machine though, and I'm sure it's probably just because it wasn't level but that right outlane looks like a monster!

Congrats again! You going to make it out to the Ottawa show?
 

tim.sanderson

Active Member
That's a hilarious video Tim! Ramps floppin' all over the place, flashers not secured...

LoL, yeah. There's a wicked lean to the right too. It's like a magnet's pulling it to the right flipper. :lol:

I brought home some very thin brass sheets (.005") to get the ramps transitions made, as well as some material to fix the edge of the upper playfield. I have the day off tomorrow, so I may take a trip to SB to pick up a complete set of rubbers and other misc. stuff.
 

tim.sanderson

Active Member
So, I've got the ramps secured, changed half of the rings/bumpers and gave it a bit of a better cleaning. I've been playing it all day, and have been wondering how the hell I lock balls. Logically it seemed it should be when it goes up the centre ramp, and triggers the 2 switches before getting kicked back onto the field. I watched a video of a guy playing his, and sure enough I was right. I went into the switch test mode, and double-sure enough, the second switch does nothing when triggered. Boooo.

The one that activates the kicker works fine though.

I'll probably leave the testing for tomorrow though.

Time for a beer and a little Adventure Time!
 

Attachments

  • work no work 2.jpg
    work no work 2.jpg
    141.9 KB · Views: 3,063
  • work no work.jpg
    work no work.jpg
    115.8 KB · Views: 3,060

WARLOCK

Administrator
Staff member
Nov 14, 2012
1,823
205
73
53
The Bluffs, Scarborough
Tim,

Great detective work and assessment!

Even better... is knowing when to stop!
Have a beer, relax.....enjoy!
Pick up pin repair another day once you have a fresh mind once again!

One of the best lessons I have learned from Menace is to know when you are done and when to stop!
No need to make any further progress at that particular moment, that day or at that particular time.
If you do, that is when you over analyse or even make mistakes.

If you are stumped... stop! Think.

Think some more...

Call for help, text, email, post, and most importantly be patient and wait!

Think some more, research, study, think...

And now I sound repetitive.......

Pick up where you left off next time. (when YOU are ready)

Congrats!

Scott


PS: Tim - I know you know a lot of this already, I am trying to post for the benefit of others that perhaps don't know this quite yet, but are reading.
 

tim.sanderson

Active Member
Last post before I hit the sack. Here's a vid showing the game in action so far. I made it before I realized the multiball deficiency:
[youtube]http://www.youtube.com/watch?v=4vqbrNv_kxA&feature=youtu.be[/youtube]
There's still a few little pieces that need to be added, (like the fins on either side of the centre ramp) and I've got some green tape on the ramps to help the ball clear the gaps. (I need to make the little metal bits that smooth out the transition between ramp/upper p.f.)

Every group of rubbers I replace sees my score go up a bit. I still have the top half of the playfield to re-rubber, not including the new bits on the upper playfield.

But I think it's playing not too bad, considering!
 

tim.sanderson

Active Member
So, I've taken apart and tested the switch. I get nothing in the open or closed positions. Is it even worth (or possible) trying to fix this switch, or should just buy a new one? Either way I think I'll order a couple just to be safe.
 

Attachments

  • lock switch.jpg
    lock switch.jpg
    55.5 KB · Views: 3,019

mwong168

Administrator
Staff member
Nov 14, 2012
6,657
1,416
113
45
Toronto
I think I might have mentioned this to you in another thread but while you are placing an order in might as well add on a new upper playfield from PBL if yours is cracked or hazy.

pbl_03-8195.jpg

http://www.pinballlife.com/index.php?p=product&id=3021

Thanks for sharing and posting that game play video