• We have upgaded to the latest version of XenForum and the process finished without any errors!!!! Enjoy the new forum!

Dr@No's fun filled (and often long-winded) restorations

DRANO

Super Member
Nov 15, 2012
2,821
517
113
Mississauga
CREATURE FEATURE


Okay...
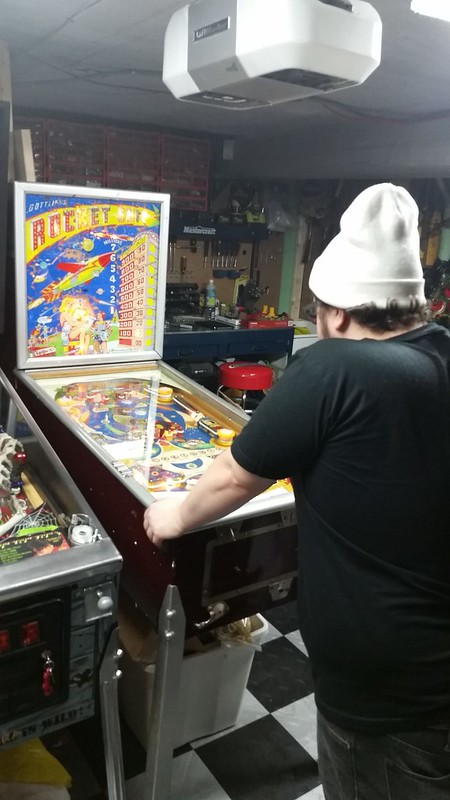
so let me go into a little detail on some of the 'projects' in this recent haul.
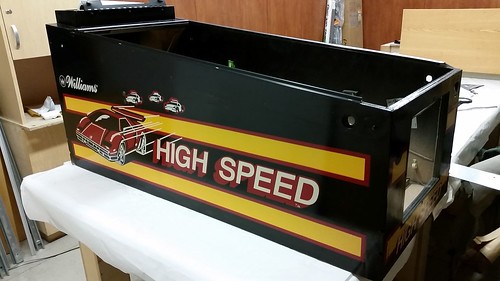
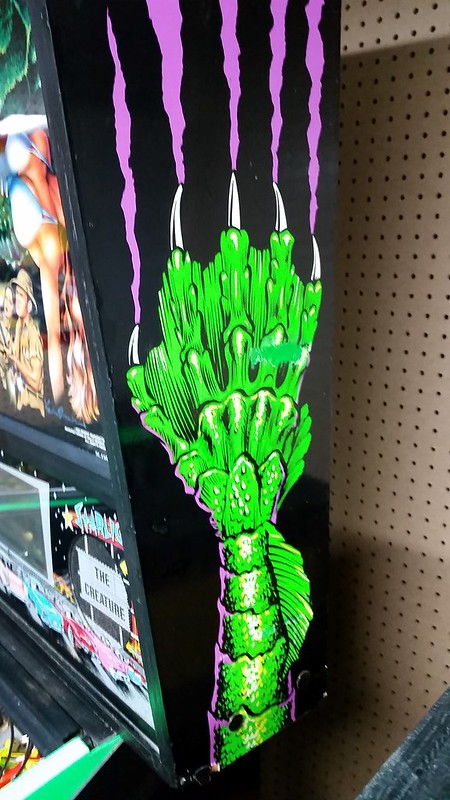
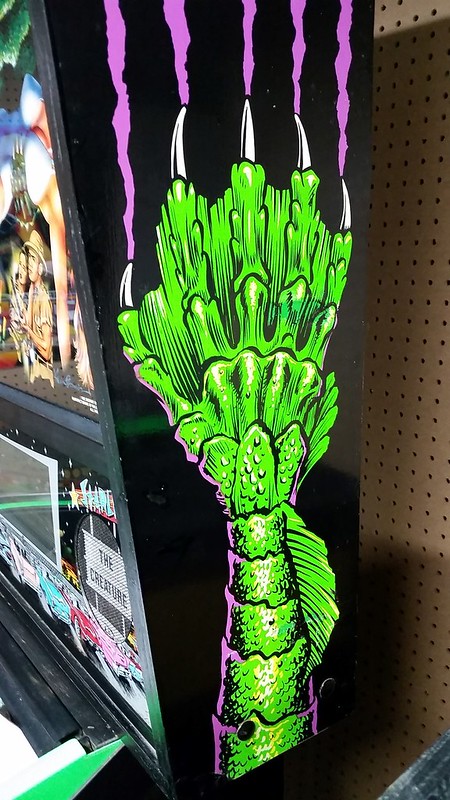
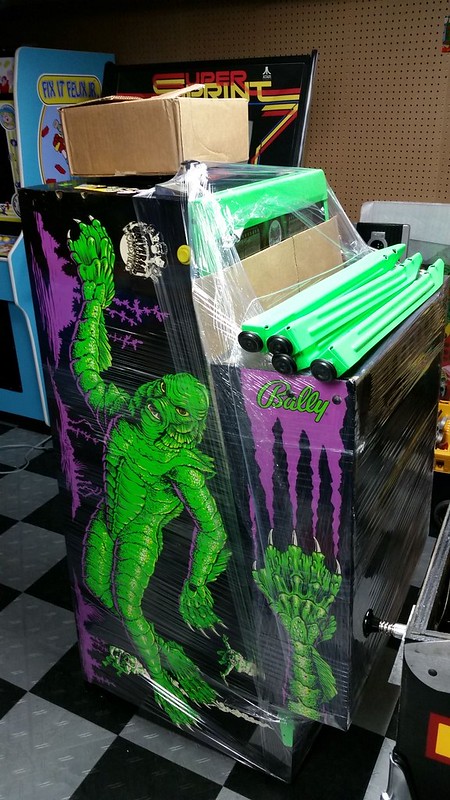
First Creech.
Love the theme, really wanted to love the game, but I never really enjoyed it much on location or playing at friend's places.
I had a similar experience with Shadow and I have since been converted after giving it a proper try at home. I wanted to do the same with Creech.
Sadly, it still wasn't for me. The game never made it past the garage and two weeks later I was looking to get it out.


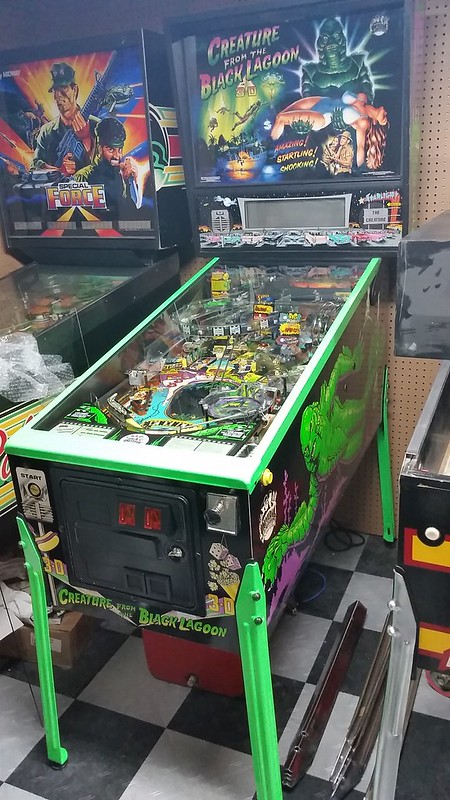
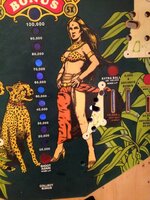
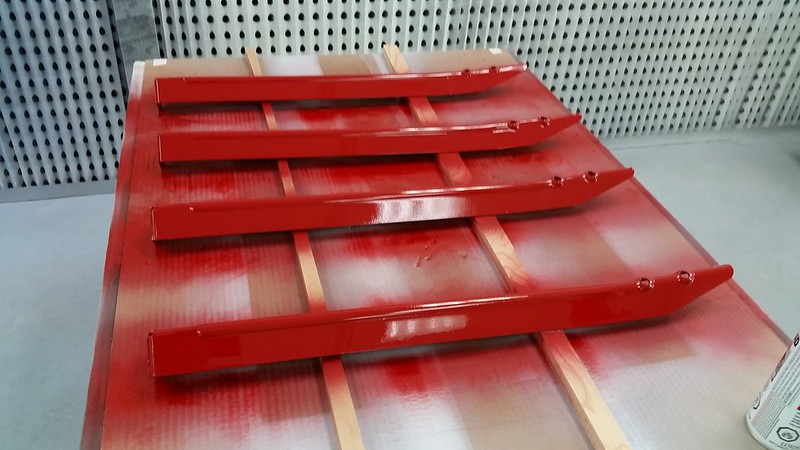
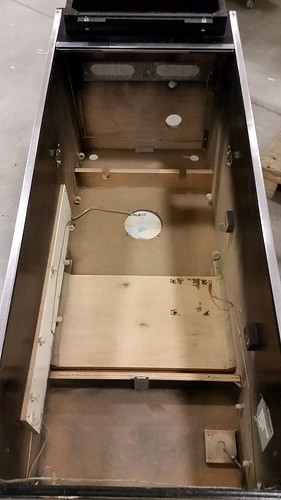
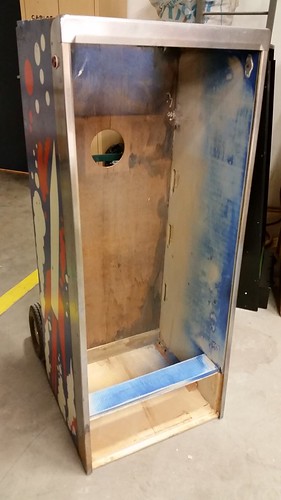
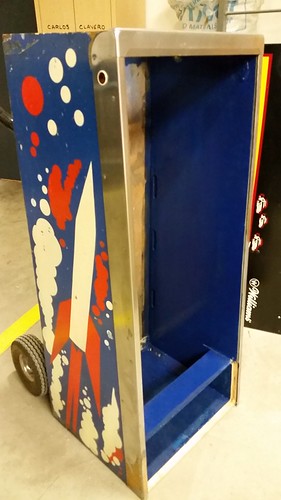
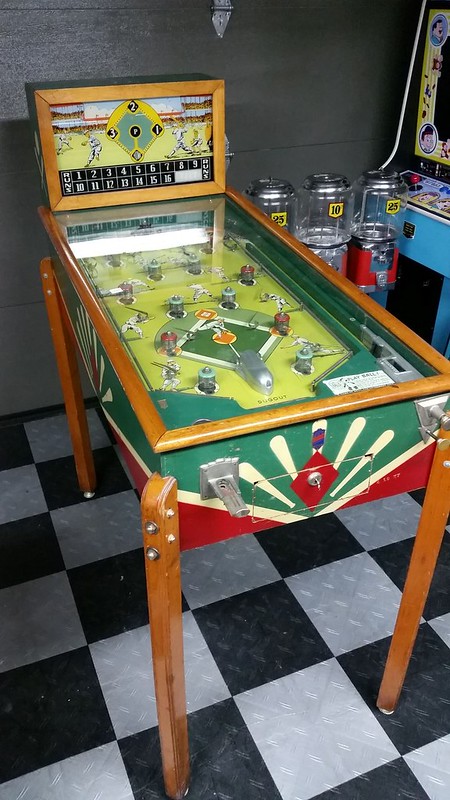
Now, it was in really nice shape and the last owner had shopped and dailed it in. He put in new ramps and tons of upgraded parts. It even had custom powdercoated trim. Not my thing, but it looked cool nonetheless.

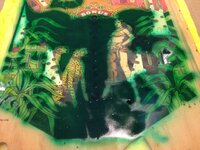
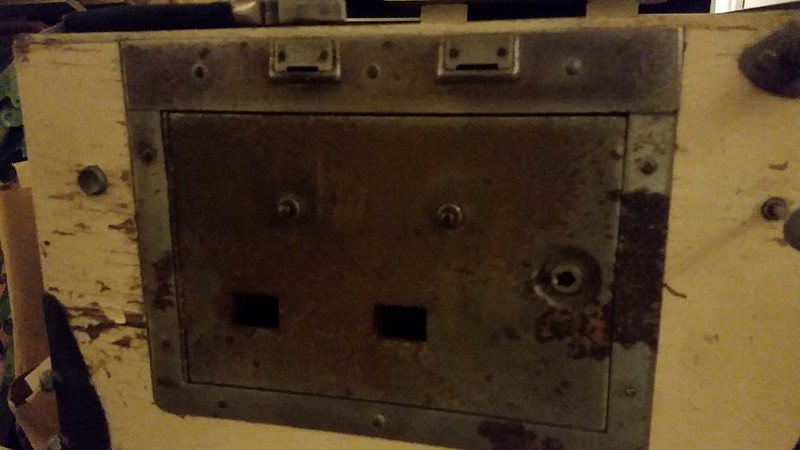
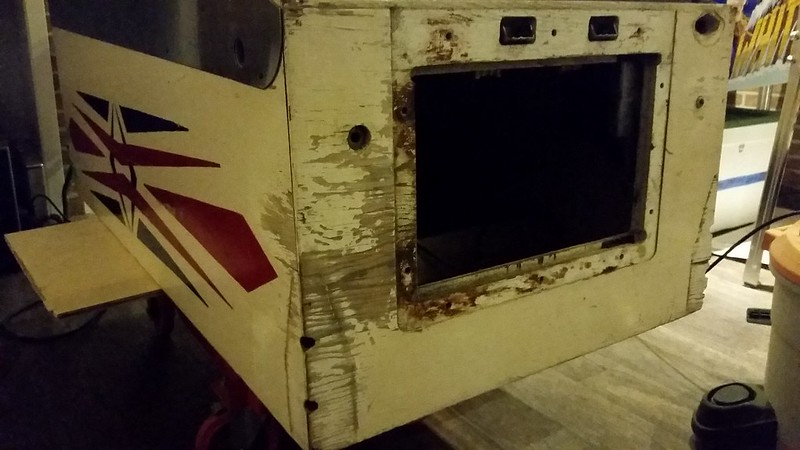
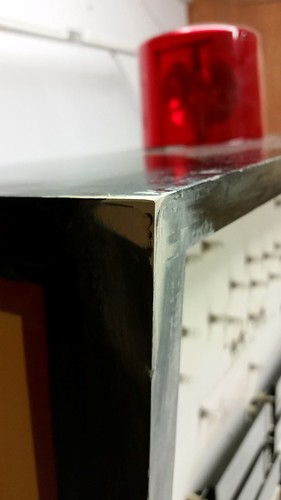
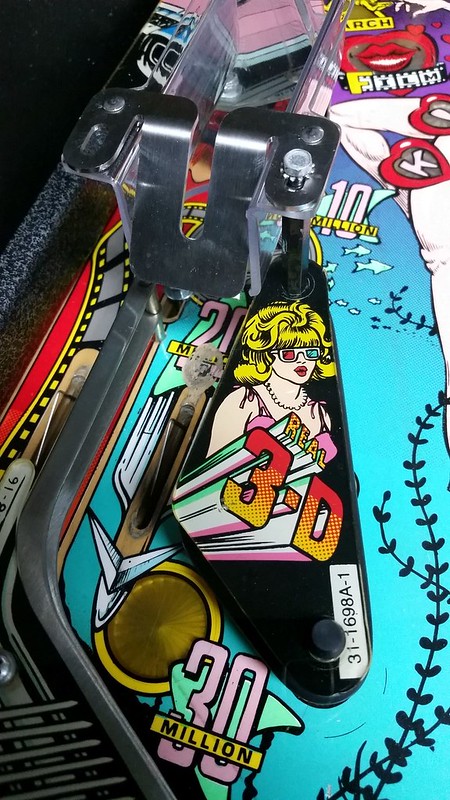
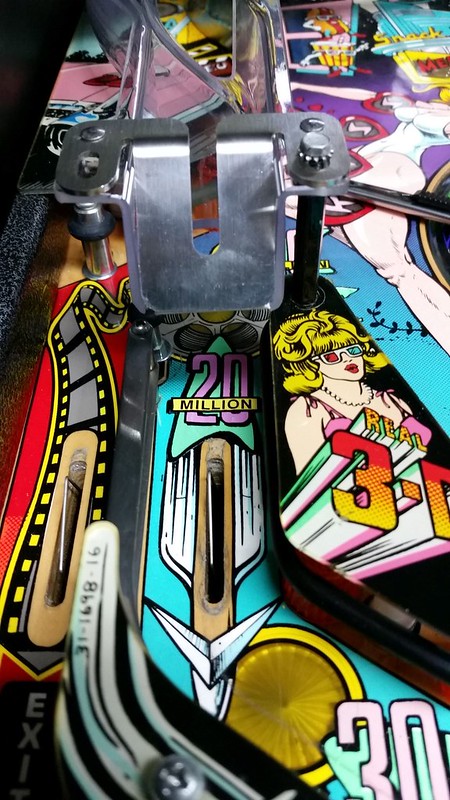
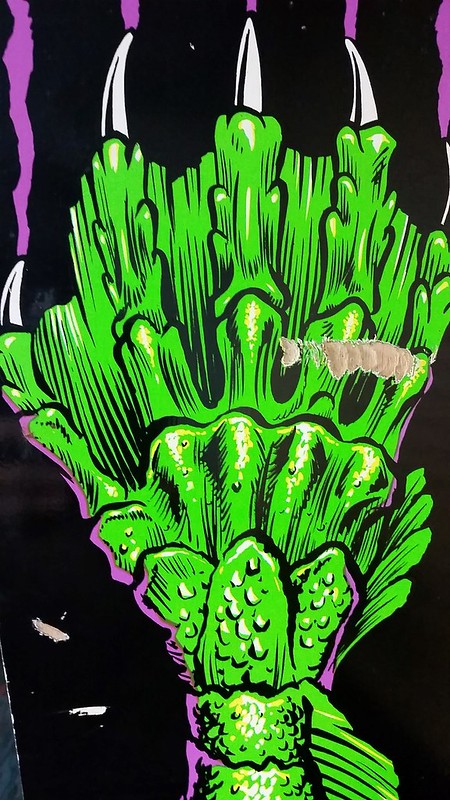
On the other hand, the pin did have some typical wear at the inlanes, one bad gash on the head and a few other minor cosmetic issues.
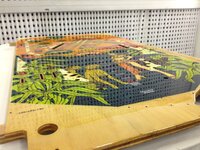
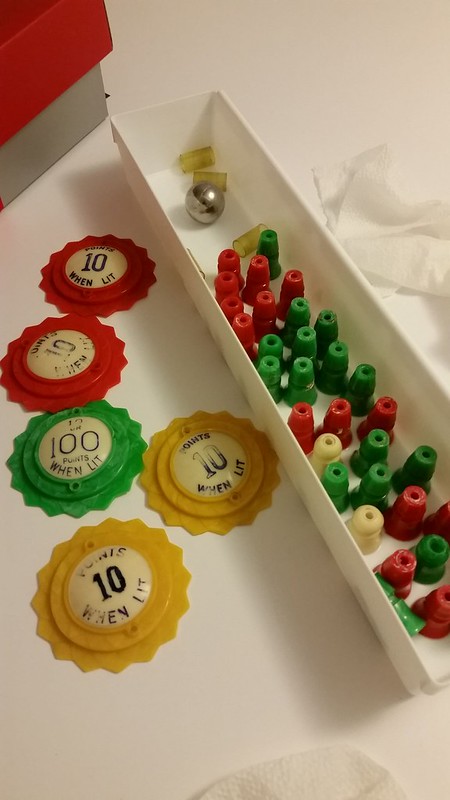
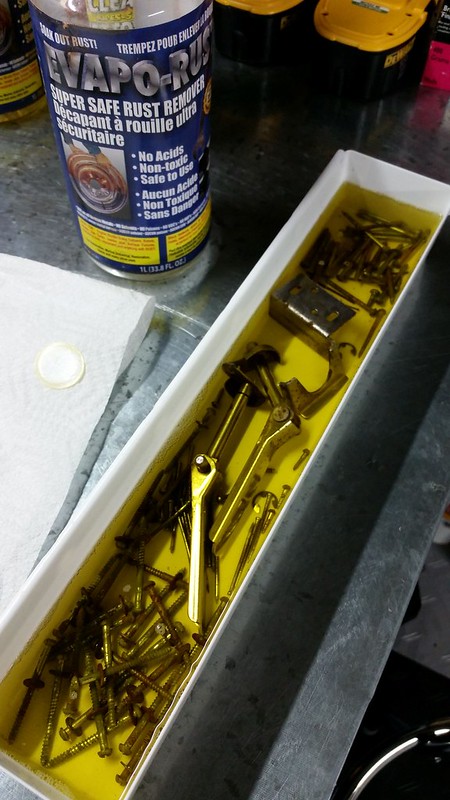
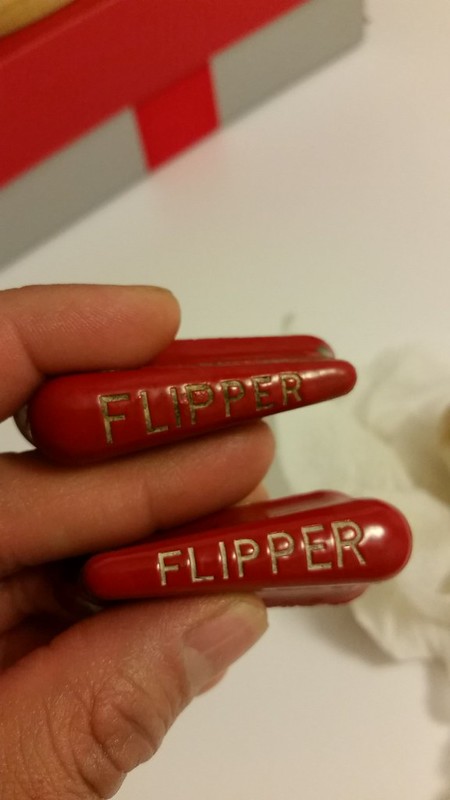
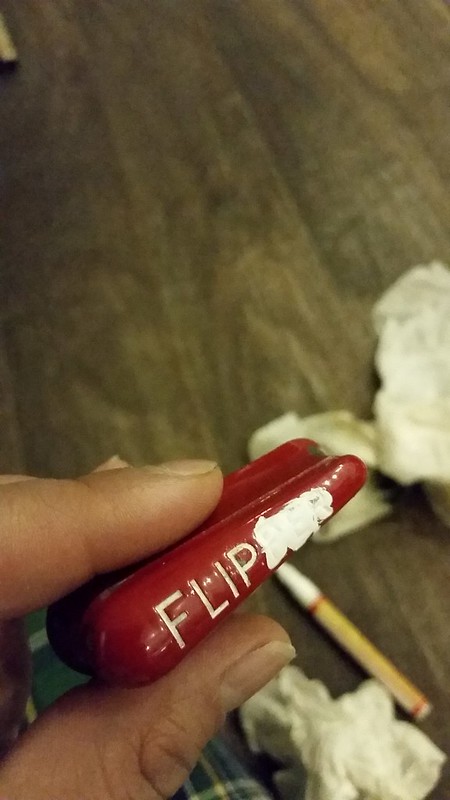
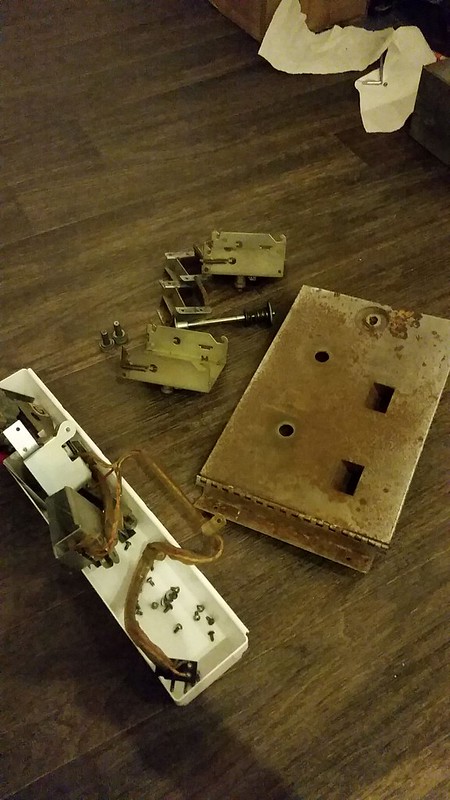
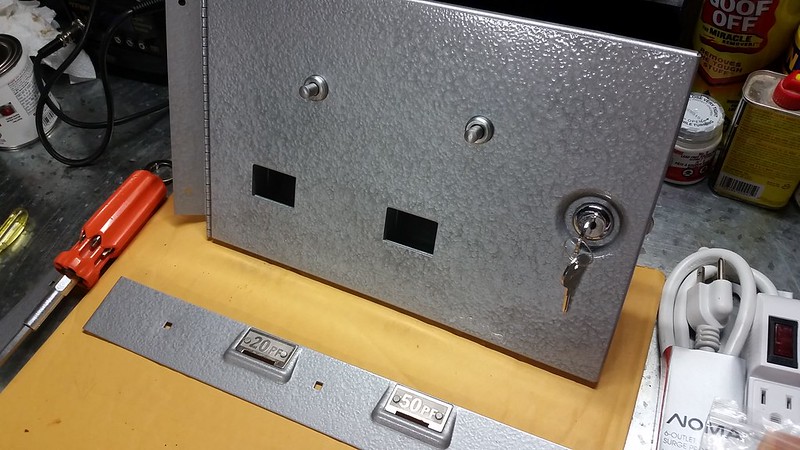
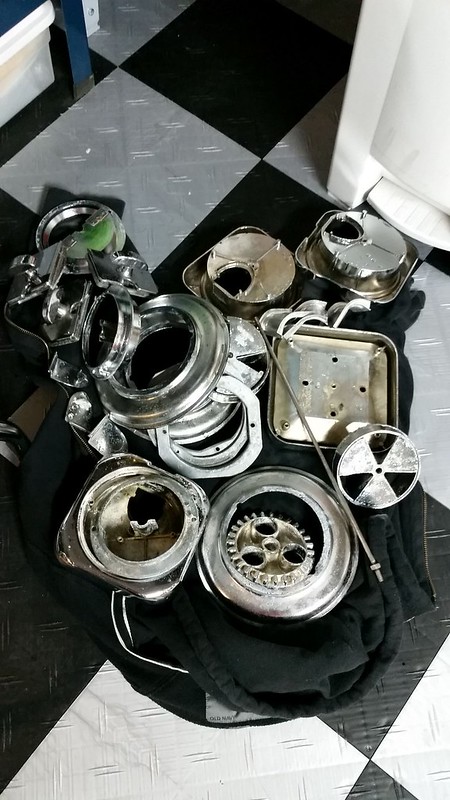
Before selling it i wanted to address those.


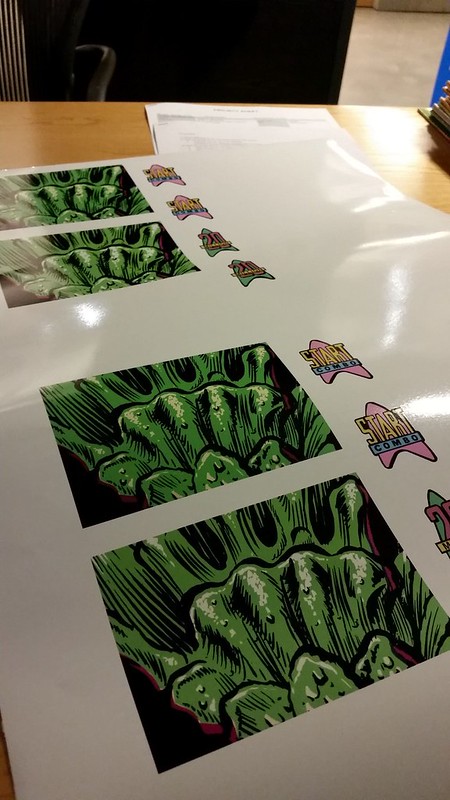
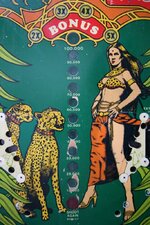
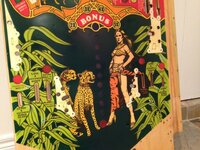
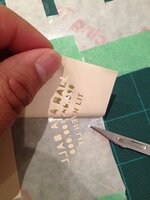
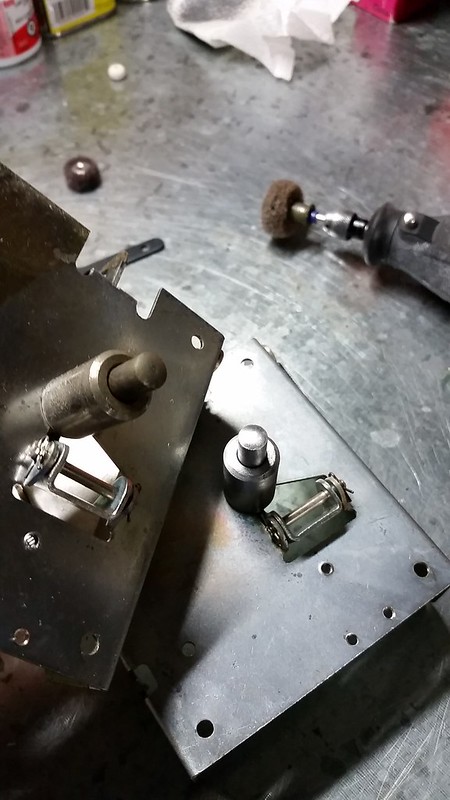
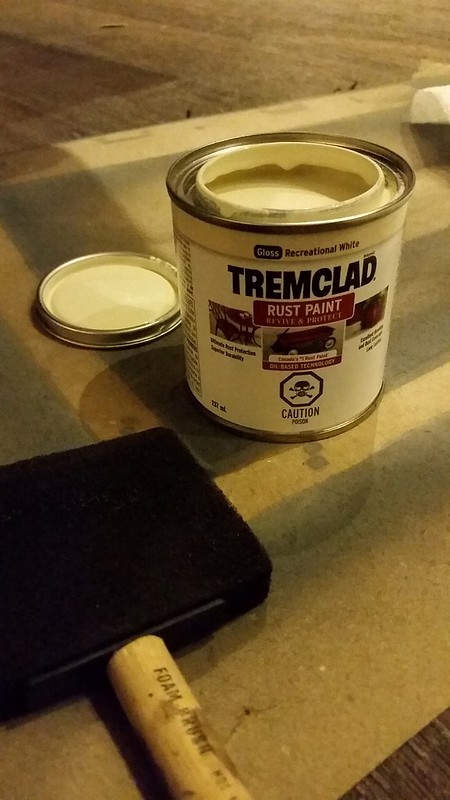
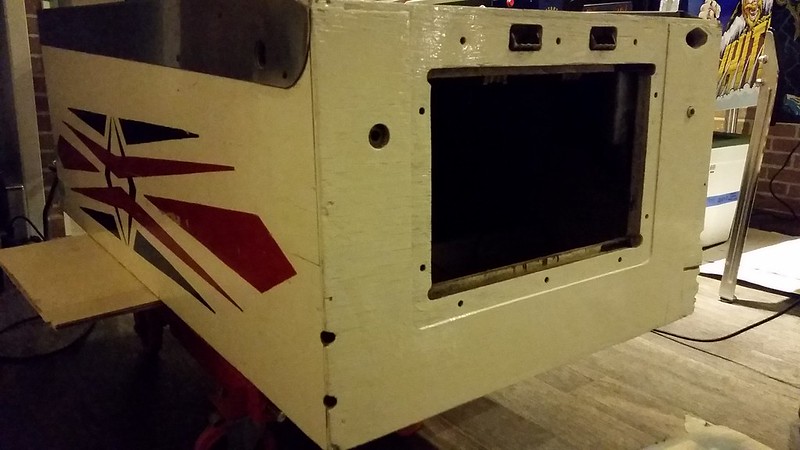
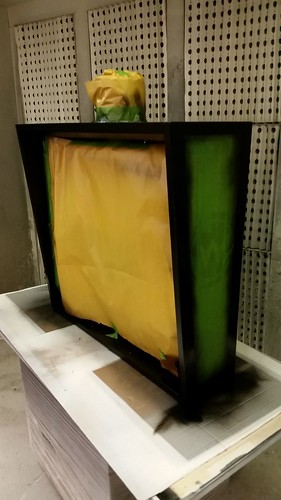
Then, onto the head....


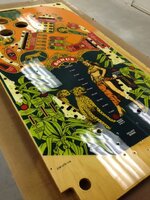
There were a few other small things here and there, but I was pretty happy with the result and the new owner got a nice looking and playing Creech.
Buh-Bye!!! :D

 
Last edited:

DRANO

Super Member
Nov 15, 2012
2,821
517
113
Mississauga
"BAO"


One quick Post on this Dragon.

Menace was good enough to pick this game up for me when I couldn't. I knew it was nice but the sheer condition of this thing was unreal.

Here's a pic of the play counter ;)

20141109_190527.jpg

But not all is rosey with a 35+ year old game that sat in a box for most of it's life.
When I got it plugged in it was having trouble starting a game and I noticed the sound board was only playing the distinctive dragon "farting" noise (quoting my kids there). The electronic 'chime' noises didn't play.

Turns out the score motor contacts were tarnished from years of sitting around. I filed them and managed to get the game starting consistently. As for the sounds, I can only blame very simple and weak electronics for this. I have since pulled the board and sent it off to a friend that has worked on these before and has some of the necessary parts in stock. For now, Dragon is silent, but hopefully it'll be back to it's happy self in a few days.

20141109_192310.jpg
 
Last edited:

DRANO

Super Member
Nov 15, 2012
2,821
517
113
Mississauga
WHEN NOT TO USE PINCAB PROTECTORS


Here's another small fix that came out of one of my recent purchases. I'll put this here as a public service announcement for those that aren't aware...

NEVER USE PINCAB PROTECTORS ON CABINETS WITH NEW DECALS!!!

I grabbed this beautiful Funhouse last week. The cabinet had been restored by one of the past owners and he did a really nice job. Sadly, pincabs were used on this game afterwards. It's an honest mistake but a potetntially costly one that will ruin your nice new cab. The pressure applied to the new decals always causes wrinkling... and now that wrinkling is further away from the legs than if you had just used legs alone. Most of you with new Sterns have seen how they started trimming the decals away from the corner and applied a metal plate to keep legs off the cab. These were probably not in existence when this FH was restored, so the owner did what he thought was best to protect the game. I'm guilty of having doen the same thing on my TZ restore.

Here's how you can fix... or at least minimize the damage.

Get a smooth edged piece of plastic. I have a special tool used for smoothing graphic applications, but an old credit card might do the trick. Apply some heat with a hair drier to the bubbled area (be careful not to overheat). This will soften the glue and material and allow you to gently push the air pocket back towards the corner and smooth out the decal. Don't force it though. If you get to the point where is doesn't want to move, poke a small hole in the bubble to let some trapped air out and gently press it down. You may have to do this more than once.

20141122_185616.jpg

20141122_185841.jpg

This is better, but not perfect. You will never remove the imprint left by the pincab completely, so you will need to keep using them.
To avoide future damage however, go and buy some of the same spacers used by Stern (you can get them at Pinball Life) and apply them first.
Then apply your pincabs and then legs. You'll likely need to buy the newer bolts that are 1/8" longer than the originals. PBL and Marcos carries them.

IMG-20141122-WA0026.jpeg

Once done your cab should look a whole lot better with little to no visible wrinkles.

IMG-20141122-WA0037.jpeg
 
Last edited:

DRANO

Super Member
Nov 15, 2012
2,821
517
113
Mississauga
HIGH SPEED STIFF


One last update from the shop for now.
High Speed has finally been completely torn down and is moving to my shop at work temporarily, where it will receive a little interior cleanup and some simple touch-ups. I'll document the parts swap over to my new CPR playfield over the coming weeks.

IMG-20141124-WA0030.jpeg

This made room for yet another container game, Scared Stiff!
My wife and I are big Elvira fans and I was realy hot for this game a couple of years ago. However, the more I played it the more basic it seemed and I took my foot off the gas on a hunt for SS. A recent chance to pick one up for a reasonable price made me give it another look. I don't mind a simple game as long as it plays well and is fun. Elvira's brand of humour is also a big plus.

IMG-20141125-WA0017.jpeg

I was amazed! The game had typical kickout wear by the crate but the spider hole looked pretty unmolested. All the ramps and plastics looked to be in awesome shape. The whole thing just seemed to be a bit dirty. I had to break into the head to get a look at the boards. Several of the big diodes had been changed. I know some WPC95 had a huge service bulletin relating to these parts. I'll assume SS was part of that. Otherwise, the boards look clean.

After converting the jumper connector for 120v and plugging it in, I fired it up and the game came up with just one error:
TIME AND DATE NOT SET :D
This was great news. I changed the batteries since it wasn't holding any settings, but the game lit up fine, the DMD is bright and strong, zero errors and minimal wear. I got pretty lucky with this one. The only big issue is a typical faded cab. All the reds looked yellow.
This is good news. I figure I'll just do what I had done with my original BSD and touch them up.
I gave the cab a good clean with some Mean Green and proceeded to do some testing.
I'll post more finished pics once complete, but here's a sneak peak showing the before and after on the red accents.
It should clean up very, very well indeed.

IMG-20141125-WA0020.jpeg

Afterwards I had a few games. It's going to need a good clean and some adjustments to play up to home standards, but it's a lot of fun to play in a quiet room when you can actually hear it.
Maybe Elvira will stick around a little longer than I figured ;)
 
Last edited:

DRANO

Super Member
Nov 15, 2012
2,821
517
113
Mississauga
Another little update.
I managed to get back to organizing my little workspace this weekend again.
My workbench is finally visible and I just have a few more things in the corner to put away... then I can install my new sink and some additonal lighting.

IMG-20141129-WA0012.jpeg

With the cleanup work done for now, I was able to turn my focus again towards touching up the Scared Stiff cabinet.
Here's a shot of the finished right side and the (still faded) left.

IMG-20141129-WA0014.jpeg


IMG-20141129-WA0016.jpeg


I needed to give my wrists and fingers a break so I took a slight pause from SS on Sunday and spent about an hour stripping down and cleaning the WIlliams Heat Wave. This game is proving to be a lot of fun and super addictive. I'm looking forward to getting it shopped and playing smooth.
I just used some Armoral orange cleaning wipes to get the big dirt off and then a magic eraser with alcohol got it really clean. I also touched up some of the black rings and artwork up the middle inserts.
Here's a before and after.

IMG-20141130-WA0027.jpeg

IMG-20141130-WA0039.jpeg


That's all for now.
I'll be cleaning, polishing and tumbling most of these parts over the next cuiople of days and hope to have the game all nice and clean before the weekend.


PS.
If anybody out there has a spare endcap for an early Williams lockdown bar (right side) please, please let me know :cry:
 
Last edited:

dr.nybble

Active Member
Nov 28, 2014
120
48
28
Ottawa
If you get tired of your Scared Stiff let me know!!

I'm embarking on my first restoration for my William's Gay 90's.
You can see the playfield here:
http://www.ipdb.org/showpic.pl?id=989&picno=24651

Wondering what you would suggest to handle white text on large coloured areas, like the "HOLE SCORES" text?
I am making transparent decals for the text.

Do you think it possible to cut frisket precisely enough around the letters to spray white and then lay a transparent decal on top?

I have white Molotow paint markers. Do you think colouring in the letters would work better? Colour the letter body and then lay the decal on top for a crisp black edge.

Without white ink decal printing I am not sure what the best way is to approach it. Or if you have ever used a decal printing service that does white ink let me know.
 

DRANO

Super Member
Nov 15, 2012
2,821
517
113
Mississauga
dr.nybble said:
If you get tired of your Scared Stiff let me know!!

I'm embarking on my first restoration for my William's Gay 90's.
You can see the playfield here:
http://www.ipdb.org/showpic.pl?id=989&picno=24651

Wondering what you would suggest to handle white text on large coloured areas, like the "HOLE SCORES" text?
I am making transparent decals for the text.

Do you think it possible to cut frisket precisely enough around the letters to spray white and then lay a transparent decal on top?

I have white Molotow paint markers. Do you think colouring in the letters would work better? Colour the letter body and then lay the decal on top for a crisp black edge.

Without white ink decal printing I am not sure what the best way is to approach it. Or if you have ever used a decal printing service that does white ink let me know.


Hey... sorry for the delayed reply. Been busy fixing stuff :D

I'd love to see actual pictures of yor playfield to make a proper assessment on how I would approach the repair.
However, those letters look large enough that the acrylic pen might do the trick. I love the MOLOTOW markers. The white (I find) is not the most opaque though, so you may not get as clean and even a coverage as you would like. Again, I'd have to see it. Worst case, the frisket should be more than able to handle areas of that size and you will get better coverage with the airbrush.

If you clearcoat over the white first you can then choose waterslide decal or frisket+paint for the black. Whatever you're more comfortable with.

If you are ever faced with super tiny text, here's what I did on a Stern Cheetah restore a while back. The copy was so small that frisket or paint pen were not feasible. My only option in that case was to paint right over it and then get someone to machine cut new text in white vinyl; then clearcoat and sand until smooth. Here are some pics. I hope to never have to do another of these Stern playfields again. The poor artists must've kept Letraset in business with all that text :FP:
 

Attachments

  • IMG_1261.JPG
    IMG_1261.JPG
    237.5 KB · Views: 51
  • IMG_3268.JPG
    IMG_3268.JPG
    184.7 KB · Views: 51
  • IMG_3273.JPG
    IMG_3273.JPG
    214.3 KB · Views: 50
  • IMG_3494.JPG
    IMG_3494.JPG
    138.3 KB · Views: 54
  • IMG_3496.JPG
    IMG_3496.JPG
    256.9 KB · Views: 47
  • IMG_3885.JPG
    IMG_3885.JPG
    217.8 KB · Views: 54
  • IMG_3887.JPG
    IMG_3887.JPG
    216.2 KB · Views: 53
  • IMG_4224.JPG
    IMG_4224.JPG
    200.4 KB · Views: 50

dr.nybble

Active Member
Nov 28, 2014
120
48
28
Ottawa
So tiny you wonder how the player would appreciate it! I'll practice frisket + airbrush and see how steady my hand is!

Have you ever investigated a Cricut or Silhouette Cameo cutter? Those look like they could be awesome for cutting frisket, even for text. At about $300 I am tempted to try it.
 

eh97ac

Active Member
Nov 19, 2012
636
149
43
Mississauga
dr.nybble said:
So tiny you wonder how the player would appreciate it! I'll practice frisket + airbrush and see how steady my hand is!

Have you ever investigated a Cricut or Silhouette Cameo cutter? Those look like they could be awesome for cutting frisket, even for text. At about $300 I am tempted to try it.

Pretty cool!
 

DRANO

Super Member
Nov 15, 2012
2,821
517
113
Mississauga
Those cutters are great; we have them at my studio (similar anyway). They work great on vinyl and I've used it many times to create super precise masks for things like the black key lines around inserts. Saves a ton of time and your fingers.
They're not so great for Frisket though. I mean, it'll cut fine but you'll need to apply a pre-mask film on top of the frisket so you can peel away the adhesive backer without the whole thing falling apart. This is assuming you're buying sheets of Frisket instead of the more economical rolls. The problem is when you go to apply the frisket down. Its not as adhesive as vinyl so, when you've placed it perfectly and then go to peel back the pre-mask backer, the Frisket comes up with it. It's just too weak.

Frisket is simply best for cutting directly on the playfield with a scalpel.
Use vinyl for any machine cut masks.
 

dr.nybble

Active Member
Nov 28, 2014
120
48
28
Ottawa
OK, good to know that cutting frisket is not going to work well. Some folks on pinside mentioned the same thing, they are using something called OraMask 813 instead.

This thread has lots of information about cutting it on the cameo: https://pinside.com/pinball/forum/topic ... -it-begins

I will try "by hand" using decals and cutting frisket and see how it goes. My playfield is considerably less complex than a modern one.
 

DRANO

Super Member
Nov 15, 2012
2,821
517
113
Mississauga
IT'S A HEAT WAVE!


I've spent the last few days 'cleaning up' this 1964 Williams Heat wave. I won't call it 'restoring'... I don't think I've done a true restoration since my White Water almost 2 years ago; probably won't do another until I get Cactus Canyon rolling in earnest. However, most of the games I've been working on this year have received some form of touch-up or attention that (I feel) has left them looking and playing a whole lot better than when I got them.
This Heat Wave reverse wedgehead is no different. It has a ton of character and it's a great player too! I just had to do what I could to try and make it shine.

Here's a quick shot of the stripped playfield. Plenty of dirt!


My first step was to wipe down the playfield and then give it a good scrub with a melamine foam (Magic Eraser) and some alcohol. After that I just cleaned up every plastic parts possible and used some Evaporust to clean up the metal parts.


The flippers got a good scrub with soapy water and a toothbrush, then I dropped in some white paint and buffed off the excess for shiny new white lettering. I also used a thin blue sharpie marker to replace the worn text on the old pop bumper camps.


[url=https://flic.kr/p/qkXk3Z]

[url=https://flic.kr/p/q4xtfX]
[URL='https://flic.kr/p/q4w4V4']
With the playfield clean and some fresh rubber applied, it already syarted to look and play a lot better. I used some acrylic markers for fast touch ups and just waxed it a ton.


[url=https://flic.kr/p/qkXjdT]
[URL='https://flic.kr/p/q4w4V4']
The next step was to address the cab and filthy metal parts like the rusty door and flipper buttons that were seizing up. Again, I used Evaporust where possible and then hand cleaned and polished all parts.


[url=https://flic.kr/p/qkTYrb]

[url=https://flic.kr/p/q4p1T5]
[URL='https://flic.kr/p/q4w4V4']
The coin door couldn't be rehabilitated, so the best option was to scrub it clean, prime it and then paint it with a hammertone finish. This is still in progress so I'll show that step later.
Last night I started to clean up the cabinet in a few areas. I found a great Tremclad paint that was a near perfect match for the cab and proceeded to work on that.


[url=https://flic.kr/p/q4ptiw]

[url=https://flic.kr/p/qiFitG]
[URL='https://flic.kr/p/q4w4V4']
I'm not gonna lie... I was getting a little high painting this right in the game room. We won't be doing that again. I think one more coat tonight should suffice. Then I'll re-assemble the door and get it all back together.

For one last little detail, I thought it would be really cool to do something fun with the legs. I had this beat up old set and decided to shoot them with a fire engine red today!
I'll need to finish up the back-side tomorrow, but this game should look HOT once done!


That's all for now. I'll post a few final pics in a couple of days when I get this all wrapped up.

Thanks for following along.
[/url][/url][/url][/url][/url][/url][/url][/url][/url][/url][/url]
 
Last edited:

DRANO

Super Member
Nov 15, 2012
2,821
517
113
Mississauga
I didn't do too much on Heat Wave last night aside from a 2nd coat of white paint on the cabinet and I re-assembled the coin door.
Here's a quick shot of the hammertone paint finish and the newly polished coin return mechs and new lock. It's not original, but far better than the rusty dirty mess I had to start with.

My red legs have also cured and I'm super excitied to put everything back on later tonight!


mwong168

Administrator
Staff member
Nov 14, 2012
6,657
1,416
113
45
Toronto
Excellent job on the coin door Drano and can't wait to try this game out next time I am over.
 

DRANO

Super Member
Nov 15, 2012
2,821
517
113
Mississauga
Thanks guys!

I got the project almost all wrapped up last night.
It could still use a couple of small touch-ups on the cabinet which I will do with a small brush and I really need to find a right side end cap for the lockdown bar; but these are pretty rare :(
I have to change out a few bulbs in the head and just give it one final once over... but I think I can wrap a big old bow on it.
Too bad it's occupying the 'ejector' spot in the gameroom right now. I don't have any room in my row of EMs. Maybe this one will come to my office for a bit.

Here's a few pics with the legs and newly refinished coin door installed. I'm reallu liking the red.
I had a few games on it last night and it plays great. Still haven't got the special though :mad:


Thanks for following along!
 
  • Like
Reactions: WARLOCK and Menace

DRANO

Super Member
Nov 15, 2012
2,821
517
113
Mississauga
I FINALLY GOT SOME WOOD(RAILS)!

I guess it was inevitable; the woodrails are coming!!!

I collected DMDs for years but, once I got my first EM, I was hooked. Ever since I have loved exploring games further and further back in time. Yes, the gameplay is different and sometimes slower... but usually much more difficult as well; often requiring one to develop skills that modern games sometime neglect.

I've been playing a lot more solid state games, but recently, a couple of EM projects have really given me a taste for restoring something a bit older. Don't get me wrong, I love modern pins too. But, there is just something special about working on a game that has been forgotten or unloved for many years. They also have that "just one more game" effect because they are so tough.

As a result I'd been looking for my first woodrail to both play and restore.
I did some research and played a few. Some are very collectible while others can be had for very little.
Also, a lot of them have pretty limited gameplay, but there are a few gems that really grabbed me.

In the end I was looking for a good player that also had a neat theme. I saw this great space themed woodrail at Mike Hanley's place and I was hooked. That pre-space age era artwork depicting Betty Grable look-alikes wearing fishbowl helmets and futuristic swimsuits was very unique. Mike wouldn’t sell me his game so off I went to find something else. My further research turned up very few titles that had similar themes. In the end, Gottlieb Universe and Rocket Ship were the two I set my sights on. The 1958 Gottlieb Rocket Ship in particular boasted a roto-target, four flippers, a couple of gobble holes and great Roy Parker artwork.


After a couple of months of hunting around I was fortunate to locate the perfect game in my backyard. Perfect in that it was close and worked and also had some element of restoration left to be done.

The condition of this game can only be described as 'vandalized'. The owner did a great job of getting it up and running but the entire cabinet has been painted and decaled... even the wooden rails and coin door had been painted silver :( So, I made arrangements to come see and then purchase it.


As luck would have it, I was looking through eBay for some woodrail era parts the evening before picking up Rocket Ship and came across someone selling a project 1947 Gottlieb Humpty Dumpty in NJ. The game was inexpensive but shipping, exchange and taxes would make it less attractive. Just the same, how could I pass up the chance to work on the very first game ever with flippers? In short, both games will soon by in the queue to be brought back to their original glory!


ROCKET SHIP


HUMPTY DUMPTY


Last edited:
  • Like
Reactions: bstock and WARLOCK

DRANO

Super Member
Nov 15, 2012
2,821
517
113
Mississauga
It's been a while since my last update. The holidays were really busy this year but I always look forward to the down time between Christmas and New Year and bank a couple of days to catch up on pinball projects.

Firstly, it was time to finally install my utility sink in the shop/garage. Nothing earth-shattering here but it's great to now have this close by and not run dwn to the laundrty room everytime I need to scrub a part.


I also figured it was high time I got to some cabinet work. I had purchased two new WPC era cabinets from ZEBULON here on PREV and they got cleaned up and sent into the spray booth for priming. I can't take much credit on this since I took advantage of the fact our finishing department was already running primer for a large job... so I just stuck them into the queue.

[url=https://flic.kr/p/qvwmmp]

To continue the cabinet theme, I proceeded to sand the inside of my HS cab and also do some small touch-ups. The head corners were chipped and generally damaged in a few areas. A little bondo sorted them out and then I simply masked the coloured areas and sprayed some gloss black. I think it turned out really sharp and is ready for some new trim.

[url=https://flic.kr/p/qvpYCC]

[url=https://flic.kr/p/qvp9b5]

[url=https://flic.kr/p/qvxFVR]

[url=https://flic.kr/p/qvxFQa]

[url=https://flic.kr/p/pQYdqm]

After HS was taken care of I brought it home to start swapping parts over to the CPR playfield. Then, I jumped over to this old Gottlieb COUNTDOWN cabinet that someone here on PREV gave me for free! My plan was always to stand it upright in my boy's room and use it as a book/toy shelf. The head would also be used and the glass could be framed and hung as well.

The frst step was to cut out all of the support struts, remove whatever I didn't need and then give it a fresh coat of paint before I made new supports and shelving. I may also create a drawer along the bottom and use the shooter rod for the pull.

[url=https://flic.kr/p/qvp91f]

[url=https://flic.kr/p/pRcdYP]

I also worked on a neat mod for my BSD, but 'll cover that in it's own thread in the 'mods' section :D
[/url][/url][/url][/url][/url][/url][/url][/url]
 

DRANO

Super Member
Nov 15, 2012
2,821
517
113
Mississauga
Time to catch up; it's been a couple of weeks.
Like a backed up toilet, the shop has started to overflow again :(

My recent Woodrail kick has forced 3 more games into the tight space. I'm collecting some necessary parts for each project and will most likley be bringing them all into my shop at work to gain some much needed space here at home. The highlight so far has been this 1937 Bally Booster. Just a beautiful game and piece of history.


Another new item has found its way into the garage.


I bought this cheap non working Williams Fan-Tas-Tic before the holidays with hopes of doing a re-theme on it. The original theme of the game makes absolutely no sense to me at all.... but that's not relevant here.
For an EM it has some really cool fatures including a roulette wheel toy that awards various things, user activated ball gate and kickout for the outlanes, user earned extra ball and the ability to collect single, double or triple bonus during game-play. In fact, thats the only way to collect bonus.
I won't divulge the theme just yet, but I enlisted the help of a local EM expert to help me modify the game. Those of you with keen eyes might figure it out.
In any case, we have replaced 3 stand-up targets with a bank of 4 drop targets that hide a SPECIAL target behind them (this game never had a special). This target may also get changed to a gobble hole that feeds a subway ramp and kicker that returns the ball to the shooter lane. Still working on that.
The left orbit was huge and we decidied to trim it down and add in a vari-target that would replciate some of the awards from the wheel. This will also allow us to remove some of the SPIN saucers that really slow down gameplay. A few other small mods were done but it's almost ready to sand down and begin the art process.

Here's what the games looked like originally:


And here it is after some preliminary modifications:


Not too much else to report except for a small side project. I found this triple Beaver vending machine out in London and it was in need of a good clean.... which turned into a good de-scaling and soak in evaporust and a couple of runs through the dishwasher.

This was slated for a special spot in my new design studio at work, so it had to look presentable.
Judging by the shield-shaped flaps, this unit has got to be at least 30-40yrs old!
I think it cleaned up pretty nicely.


Her'es a special shot of my favorite corner of the new design studio :D


That's about it for now.
Next up should be High Speed playfield swap and getting deeper into my Scared Stiff touch-up and cleanup now that I have all the parts I was waiting on.
 
Last edited: