A couple weeks ago I ordered a playfield protector from http://www.bestofpinball.de/catalog/index.php for my f14 game. I though this was a great solution for me for a couple different reasons and it also had a good review on pinball news. http://www.pinballnews.com/learn/playfi ... index.html
I liked the fact that for a noobie like me, I wouldn't have to remove the underside of the playfield, I like that i wouldn't have to remove the cracked chevron inserts that I can't find replacements for, I like that this is not a permanent addition to the game so I have the option to clearcoat in the future if it doesn't turn out, but most of all, I like knowing that my game won't be out of service for months on end.
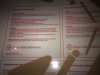
The web site said 119€. They only billed me 100€, they might have had a sale, I don't know, I'm not complaining. Shipping and convertion to Canadian and then a surprise duty charge...it ended up costing about $200. I'd imagine if I totally stripped my playfield then had to take it to a local auto shop for clear coating it would be $75-$100, but again I don't know.
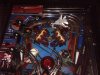
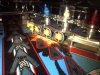
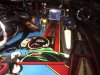
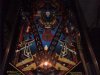
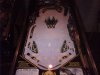
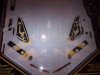
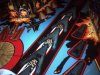
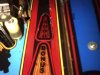
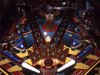
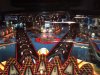
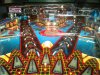
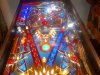
My playfield was rough, many raised inserts, most only 1/32" but enough for the ball to be effected, and enough to make clear coating a pain in the ass, the proper way to fix this would be to remove all the inserts, polish them, reinstall the inserts and spray on the clear. That process takes along time, and I know I have cracked inserts that I can't replace.
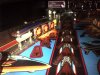
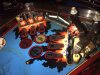
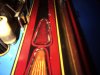
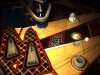
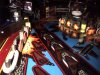
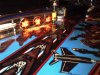
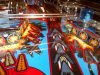
To install the playfield protector I will need to remove the wire habitrails, most of the playfield plastics, some ball gates and the inlanes. I have already removed the factory Mylar for my game, it was very bubbly, pulling up in corners and ugly looking. While removing the Mylar I pulled some paint up, very little, worse on inserts where the Mylar was bubbled.
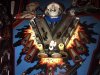
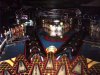
The worst paint loss was above the pop bumper, but all and all the playfield looks good
I liked the fact that for a noobie like me, I wouldn't have to remove the underside of the playfield, I like that i wouldn't have to remove the cracked chevron inserts that I can't find replacements for, I like that this is not a permanent addition to the game so I have the option to clearcoat in the future if it doesn't turn out, but most of all, I like knowing that my game won't be out of service for months on end.
The web site said 119€. They only billed me 100€, they might have had a sale, I don't know, I'm not complaining. Shipping and convertion to Canadian and then a surprise duty charge...it ended up costing about $200. I'd imagine if I totally stripped my playfield then had to take it to a local auto shop for clear coating it would be $75-$100, but again I don't know.
My playfield was rough, many raised inserts, most only 1/32" but enough for the ball to be effected, and enough to make clear coating a pain in the ass, the proper way to fix this would be to remove all the inserts, polish them, reinstall the inserts and spray on the clear. That process takes along time, and I know I have cracked inserts that I can't replace.
To install the playfield protector I will need to remove the wire habitrails, most of the playfield plastics, some ball gates and the inlanes. I have already removed the factory Mylar for my game, it was very bubbly, pulling up in corners and ugly looking. While removing the Mylar I pulled some paint up, very little, worse on inserts where the Mylar was bubbled.
The worst paint loss was above the pop bumper, but all and all the playfield looks good