• We have upgaded to the latest version of XenForum and the process finished without any errors!!!! Enjoy the new forum!

My JM Refurb Adventure

Budfan

Member
May 18, 2013
83
8
8
Barrie Ontario
I waited a week for decals on the head to settle. Then I began the braiding and replacement of all the components for the back box. 20141011_170734.jpg 20141011_162654.jpg
 

Budfan

Member
May 18, 2013
83
8
8
Barrie Ontario
After the head was done, I started braiding and replacing all the inside cabinet parts. I used ZEP citric de-greaser on each wire harness. I don't have an ultrasonic cleaner so I did them all by hand. What a PITA! However, they came out super clean.

The transformer was filthy. I used the degreaser there as well. Have a micro fiber cloth and spray the degreaser on the cloth...don't spray on the transformer! I used a tooth brush to get in the crevices and it came out real well. I then took my air compressor and sprayed the transformer to ensure there was no liquid left. The degreaser actually evaporates fairly fast.

It took me 3 days to complete the inside of the cab. I would work a couple hours a night on it. I used an electric staple gun to fasten the braid. It got in all the tight spots easily.

This was when I was really starting to see some results and the light at the end of tunnel was visible!

20141011_170841.jpg 20141011_170852.jpg 20141011_170912.jpg 20141011_170929.jpg 20141011_170937.jpg 20141011_173135.jpg 20141011_173153.jpg
 

Budfan

Member
May 18, 2013
83
8
8
Barrie Ontario
Now is the part where I tell you about my coin door experience! When I removed the coin door, the wires that hooked up to the coin door were spliced into ribbon cable and the ground wire was cut! I took pictures of the mess. I was so glad I ordered all those molex connectors because I had to create a new connector and make sure the wires were making the right connection the the right connecting post. I also had to purchase some 18g wire. I had to replace 3 full length connectors.

This is where you really have to stop, breath, sit down and open the operators manual. Then you need to have a basic understanding of schematics. I was very lucky because the schematics described the wires correctly. When the manual stated the blue/white wire was for the + button, it was. After about 3 hours, I had read, re-read and confirmed which wire went where. Now, I would not be able to test my work until the machine actually turned on (more on that later).

I completely stripped the coin door paint using airplane grade paint remover. There are all sorts of different brands. Don't worry, just make sure you buy "airplane" paint remover. Take your pieces out in the back yard or front yard, winter/summer/spring/fall doesn't matter. Spray this stuff on it and within seconds the paint/primer/rust bubbles right off! Use this stuff for your pinball legs too! Anyway, do one side and then the other. Simply use a garden hose or if you are hard core, use your power washer! I removed all the paint on the door within 30 minutes. VERY IMPORTANT - wear eye protection and when you have sprayed all the paint off, dry it right away or it will rust.

For the coin door, I sprayed one coat of Rustoleum Grey metal primer. Let it cure for 24 hours and then sprayed two coats of Rustoleum flat black on the door (one hour between coats). I did not paint the two cut outs on the door. Instead I smoothed and polished them so they stand out. Don't know why, but just went with it.....and I think it looks sharp.

20140611_192744.jpg 20140622_142946.jpg 20140915_121257.jpg 20140915_121314.jpg 20140915_121320.jpg 20140915_121336.jpg 20140915_121342.jpg 20140915_121350.jpg 20140915_121405.jpg 20140915_121415.jpg
 

Budfan

Member
May 18, 2013
83
8
8
Barrie Ontario
Then I put the rails on. I thought putting decals on was easy...well this is even easier. Just line them up properly and put the right amount of two sided tape...one man job.

20141011_173212.jpg 20141011_173518.jpg 20141011_191835.jpg 20141012_075437.jpg 20141012_075444.jpg
 

Budfan

Member
May 18, 2013
83
8
8
Barrie Ontario
The entire cab and head assembly are now done. Whew! I put it in its future spot and covered it with a blanket and put a sign on it that said "Do not touch". My kids have people over all the time and I didn't want one of them messing around with it.....I was actually more worried about my own kids messing around with it.

Next will be the playfield population! This is where the real war begins! Believe me, they don't go back together as fast as they come apart!
 
  • Like
Reactions: FastEd and brad808

Budfan

Member
May 18, 2013
83
8
8
Barrie Ontario
Too tired to post yesterday morning. The CC playfield I received was and is in pristine shape. When I shopped out my CFTBL in 2013, I made a rotisserie "as seen on Pinside". The trick to putting a playfield back to together is making sure you have pictures. I took at least 300 pictures of the playfield when I tore it down. Putting it back together, I decided to start with the underside first.

20141013_134207.jpg 20141013_154000.jpg 20141013_154026.jpg 20141013_164713.jpg 20141013_164716.jpg 20141015_193840.jpg 20141015_193901.jpg 20141015_193905.jpg 20141017_173127.jpg
 

Budfan

Member
May 18, 2013
83
8
8
Barrie Ontario
Yes, I love Gingerale. I love it even more with my Crown Royale. As you can see I started with putting all the light boards on first, followed by the lamp, switch and coil harnesses. As I stated earlier, I used ZEP to clean all of the harness prior to putting them on. All of the metal pieces were emery clothed and polished.

Now on to the top of the playfield.

20141018_143451.jpg 20141018_143503.jpg 20141018_180744.jpg 20141018_180754.jpg 20141019_190254.jpg 20141019_190308.jpg 20141021_203924.jpg 20141021_203928.jpg
 

Budfan

Member
May 18, 2013
83
8
8
Barrie Ontario
Since doing this refurb, I have learned that putting the pop bumpers and any other playfield toys on first will save alot of time with running the harnesses. JM only has the Crazy Bob scoop, pop bumpers and target/hand popper.

Another tip, is to put the playfield rails on right away. Keeps the playfield straight and more importantly, they are a pain to put on after you have assembled the underside. I sanded and painted the rails prior to having them put on. Rustoleum gloss black rattle can.

More progress pics.

20141024_165945.jpg 20141024_165955.jpg 20141024_170002.jpg 20141024_170010.jpg 20141024_170025.jpg 20141024_170033.jpg 20141024_170039.jpg
 

Budfan

Member
May 18, 2013
83
8
8
Barrie Ontario
Once I had the underside supports put on, I take it off the rotisserie. Reason #1, I have to put the hand mech on. Reason #2, its easier to put the ramps on. During this phase, there were alot of post holes that needed to be drilled to remove the clear coat that dripped into them. This slowed my progress significantly and I should have test fitted the posts at the start and done it all at that time. Lesson learned. All in all the reassembly was fairly easy, just time consuming. More progress pics.

20141029_200324.jpg 20141029_200332.jpg 20141029_200337.jpg 20141029_200343.jpg 20141029_200353.jpg 20141029_200400.jpg 20141029_200411.jpg 20141031_214500.jpg 20141031_214505.jpg 20141031_214510.jpg
 

Budfan

Member
May 18, 2013
83
8
8
Barrie Ontario
Yes, I changed the teal pop bumper caps for difference coloured ones. I have new teal ones but I wanted to give a different colour to that area. The hand mech went on real easy. I replaced all the bulbs for LED in the entire machine. Thank you Art! Now the entire playfield is assembled and ready to drop into the cab. This is a two person job, but can be done by one. Have the cab on the ground with no legs on. Simply turn the playfield upside down, grab each side, maneuver above the cab all the way to the back and lower it to the rails. Then lower the front end and it will slide toward you (from the front of cab) and lock in place.

20141101_133804.jpg 20141101_133810.jpg 20141101_140145.jpg 20141101_140156.jpg 20141101_140204.jpg 20141101_140215.jpg 20141101_140224.jpg 20141101_140232.jpg 20141101_140240.jpg 20141101_140252.jpg
 

Budfan

Member
May 18, 2013
83
8
8
Barrie Ontario
Reconnected all connectors to the back box and cabinet. Got Flashinsticts restore decals and put them on. Then put the legs on and fired it up!

It came alive! There were not test report bugs except for the date! I went into the menu and thats when I realized I had wired the + and - wires in reverse! No biggy fix that later. Then I set the date, put on free play, exited menu and pushed the start button. Ball plunged, flippers worked and then the ball hit the stand up target....thats when my problems started!

The DMD started to garble and target kept popping up and down. Shit!! I turned it off.

I lifted playfield and started inspecting. Everything looked attached. Didn't see any bare wires. Reseated the DMD board cables.

Rebooted. MPU boot sequence is fine. Now the DMD letters were double the normal size and the GI was out! ARGGGGGHHHH!!

Out comes the DMM. I start testing voltages and to the board and everything checks out. I spent every evening for two weeks checking every thing. I can't find any major anomalies. I decided to fire it up again. Well, now it doesn't boot at all! FML!!! I know I am getting power because the LEDs on the driver board and MPU are lighting up....but the MPU sequence is incorrect. One LED that should flash is solid.
 

Budfan

Member
May 18, 2013
83
8
8
Barrie Ontario
Ok...enough. Time to pull my driver board from Getaway. I put the Getaway driver board into JM. I power on....and nothing! Now I am in a position way above my pay grade! However, the stubborn part of me does not admit defeat. I get on the web and start researching similar problems. During this "research", I replace caps, resistors and even a TIP.....and still nothing.

Well, I am totally losing my mind! I decide to remove game ROM on the MPU and replace it.... because someone on Pinside mentioned that it worked for them in a tech thread.

I hit the power button and the lights go on on the playfield, but nothing else. Progress!!!! I think.

So, I put my JM driver board in my Getaway and my Getaway worked! Don't know why I didn't do that first....

Now I know my problem is with the MPU. Doesn't make sense though, because there is no acid damage at all on the MPU and I didn't do anything but remove the batteries when I stored it for the refurb.

Finally, I decide to pull the ASIC chip and see if I might have done something to it when I remounted the board in the back box. If that is not it, then I am going to admit defeat, call in a tech and have Mike remind me of how I screwed up a perfectly serviceable board.

I pull the chip, inspect...it looks fine. I inspect the socket...it appears fine..no lifting, separation or acid damage.

I put the chip back in.

I then reconnect everything, drop the playfield and flip the switch.

Yep....the entire machine comes back from flatline! Sounds, lights, DMD, everything! I turn it off right away. I get the balls, drop them in.

Turn it on again...and holy crap...it still works!

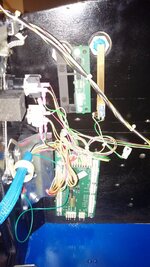
I get one test report...ball in hand. I play a game...everything works...except one pop bumper. I don't care! Right now I am just happy that its up and running. Some final pics I took with my phone...too exited to take some final pictures of the entire machine, but I will take some soon and post.

20141120_191604.jpg 20141120_191610.jpg 20141120_191619.jpg 20141120_191648.jpg 20141120_191656.jpg 20141120_191703.jpg 20141120_191722.jpg
20141120_191738.jpg
 
  • Like
Reactions: brad808

Budfan

Member
May 18, 2013
83
8
8
Barrie Ontario
I have since put in the GI OCD board... I have a video of how big of an improvement it is. Especially when you hit wizard mode! I will post it once I download it off my new phone.

The machine plays rock solid and has no credit dots at all. Whoever says that an imperfection "does not affect gameplay" obviously doesn't have OCD like I do. If I know something is not working as intended or a bulb is out, or if there is a crack in a ramp...it drives me ape shit! I can't play unless those are rectified.

Anyway, as I said at the beginning, the purpose of this thread was to give back to the community. I never would have attempted this without knowing that I could count on the community out there to help and guide me along the way.

If you are new to the "hobby", don't worry...we were all "new". Embrace it! Share it! Most importantly...play it!!!