Most probably know by now that when you buy a Stern Pro you get a pretty bastardized pinball in favor of their Premium/LE models of the same game. Features that use to be standard on all their pins have been removed and replaced with cheaper alternatives and it seems to not stop there as their latest Star Trek Pro does not have the backbox allen key lock latch anymore. Such a shame as I always thought this was the only thing Stern did better then Bally/Williams :lol:
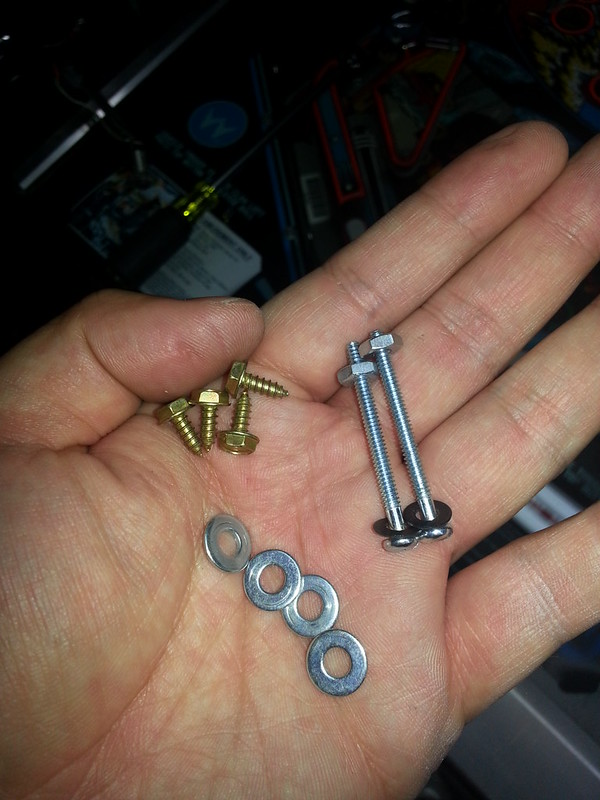
Anyways, I'm going to show you how to install the now after market Stern Playfield Support rails. They can be purchased from Pinball Life for $54.95 and comes with all the hardware required to do the installation along with instructions. I was not so fortunate and got the rails only and the additional hardware was missing which is not a big deal as you will see shortly.

http://www.pinballlife.com/index.php?p=product&id=1956
What you will want to do first is remove the lockdown bar, playfield glass and pinballs. Next you will use your nut driver and remove your instruction cards to expose the two nuts that are holding the apron down.
At this point you will want to pull your playfield forward and rest the pegs just on top of what would have been your lockbar receiver mechanism. To remove these pegs you will need to use a socket on top and an adjustable wrench below otherwise it will not work.
The reason you want to remove these pegs is because you no longer need them and it will get in the way to make use of this hole to secure the playfield support slide brackets.
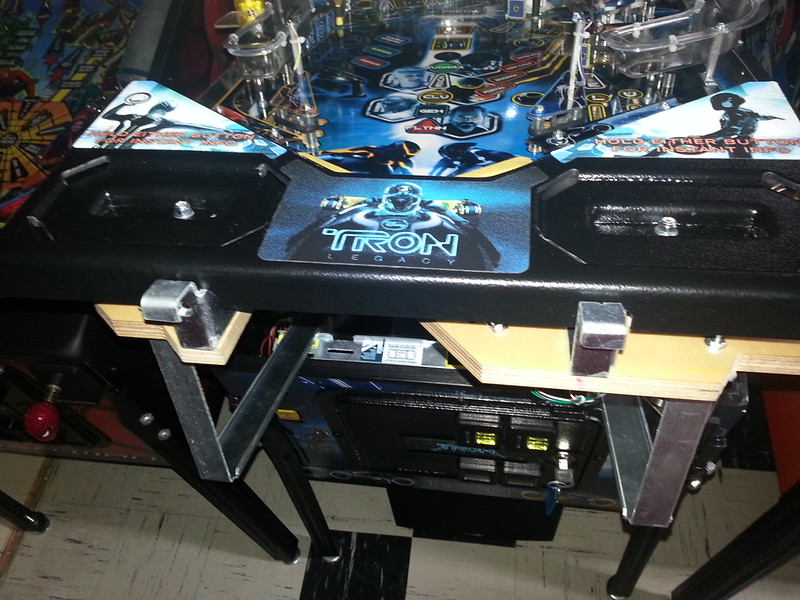
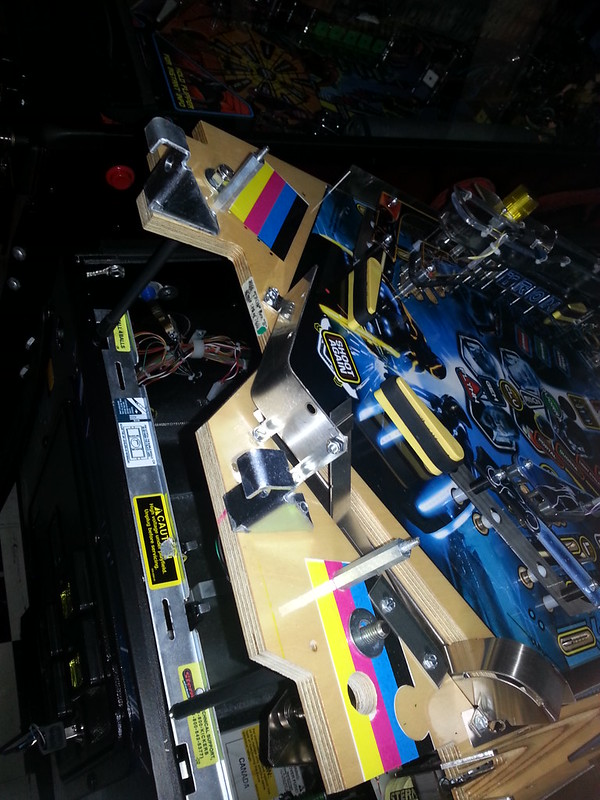
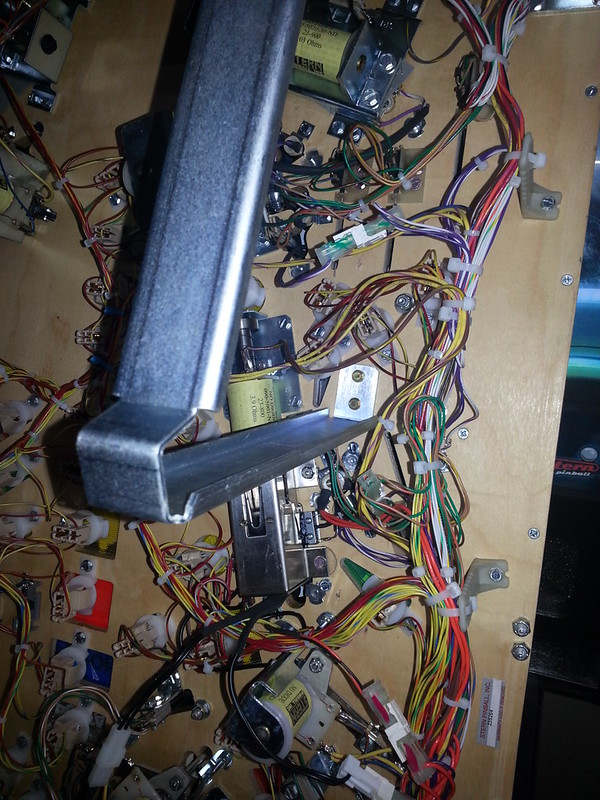
I removed the big nut from the pegs from the top on both sides and slowly started to lift my playfield into the upright position. I was holding onto the sides of the playfield and removed the pegs from the bottom at the same time. Once in the upright position I started to position the slide brackets so that the top hole is aligned with the factory whole on the top.
I had to dig around my parts stash and find something I could use to mount these slide brackets from the bottom side of the playfield. Be careful what length screws you use because if they are too long you will have an unpleasant surprise when you lower your playfield later.
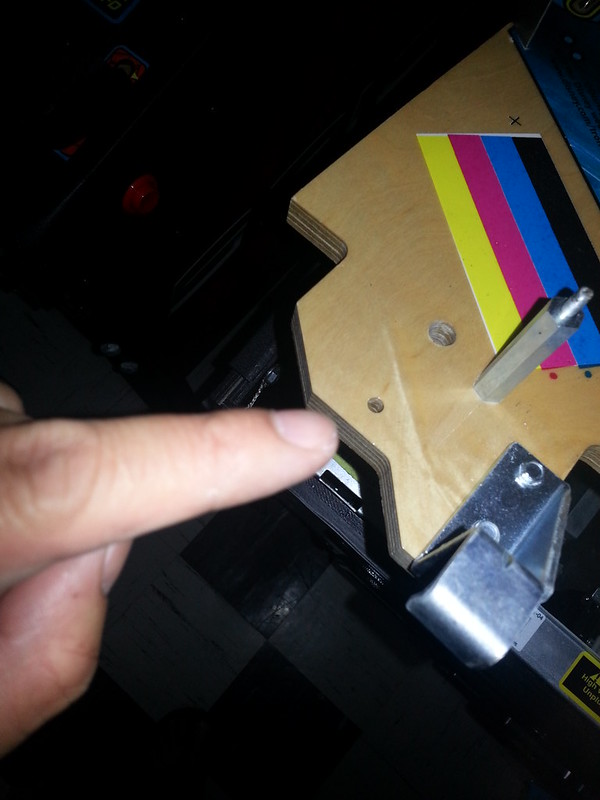
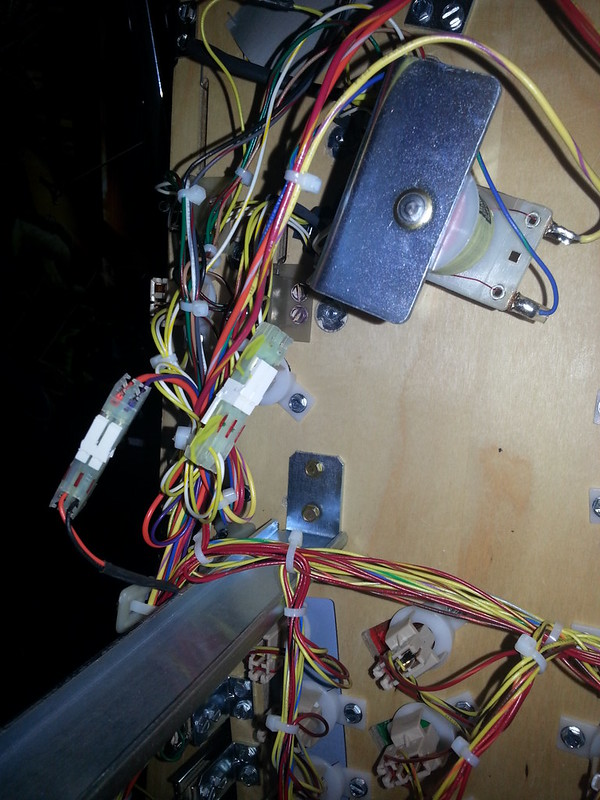
Pick your mounting points so that it is far away from light sockets, coils, inserts, etc. Here are the points I used on my game:
Now I careful lower the playfield and rest the slide brackets on the cab and now I install the last screw, washer and nut through the existing holes under the apron. These work but are a bit longer then I would like but not much I could do since it is almost 1:00am besides they are out of sight once the apron is on anyways.
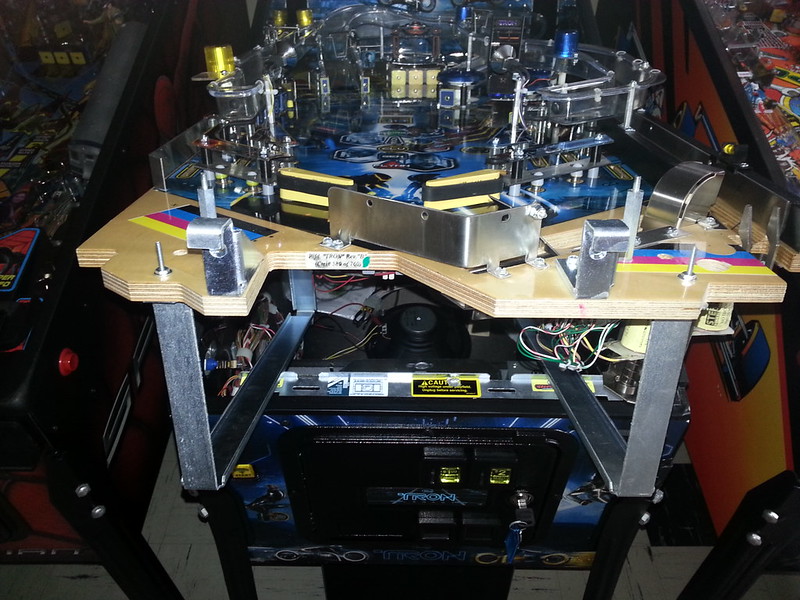
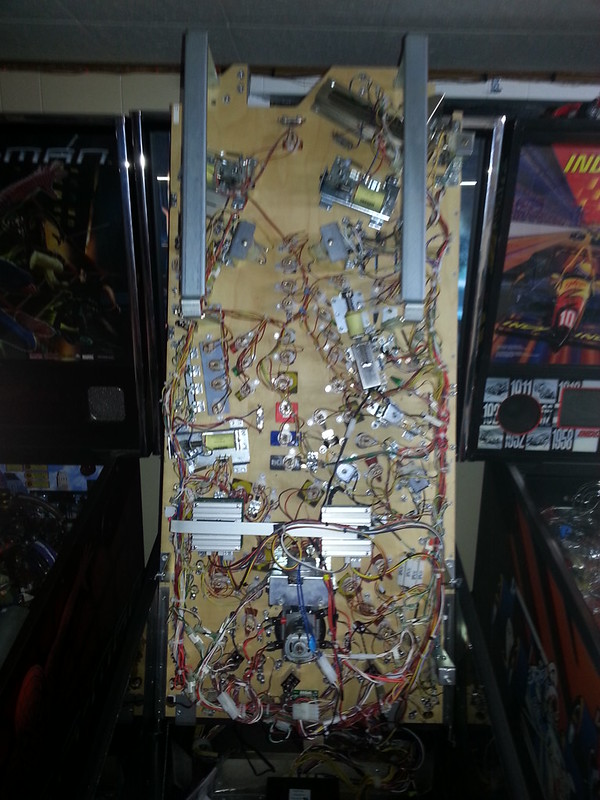
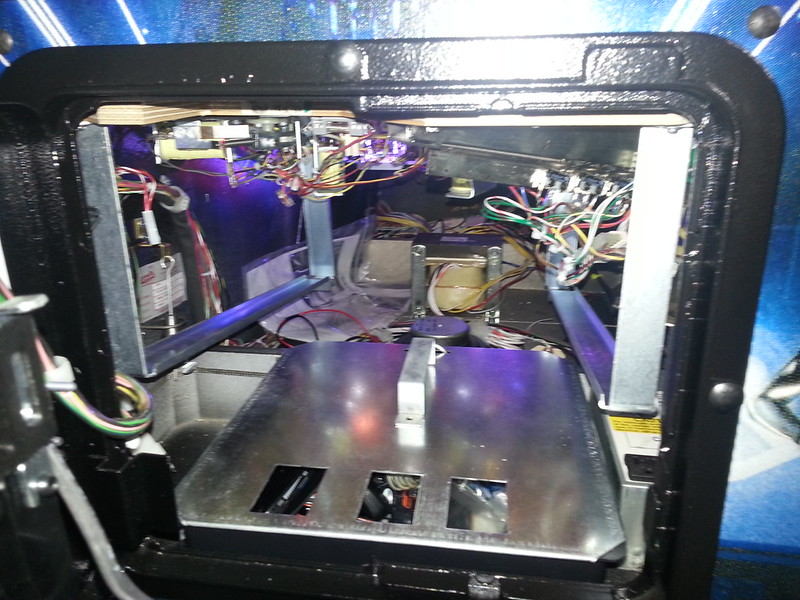
That is pretty much it and make sure I tighten all the hardware one last time before I re-install the apron and here is what it looks like inside the game after 15 minutes
I may or may not put in a proper lockdown bar and receiver if I happen to come across one cheap otherwise I don't mind the one that came in my Tron Pro. I don't bother using the hasps for the lockdown bar and works out nicely because if I ever get a stuck ball or LED bulb falls out I can get access without grabbing the keys to my coin door.
While I was working on Tron, I order these Blue pop bumper caps in my last Marco order and never liked the way the stock ones looked.
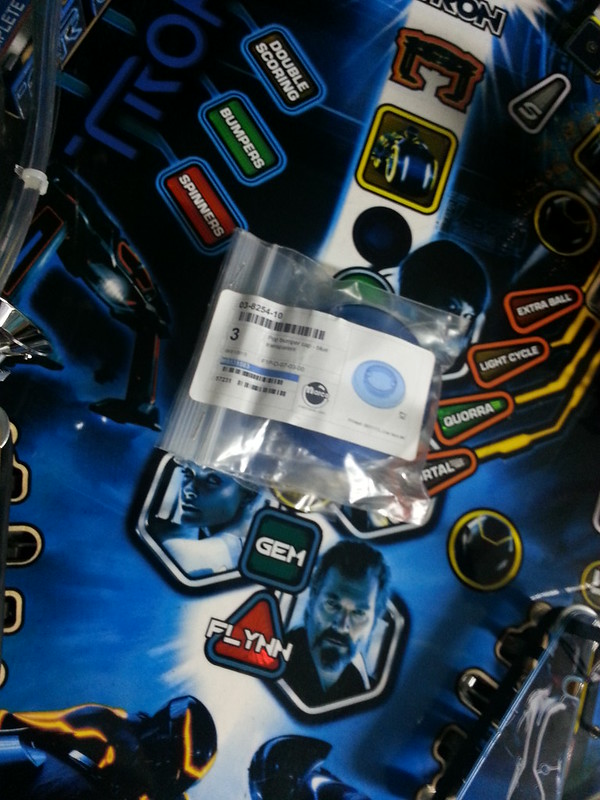
I was going to order the cool looking pinbits ones but saw someone put these in their Tron and didn't look too bad and a hell of a lot cheaper too!
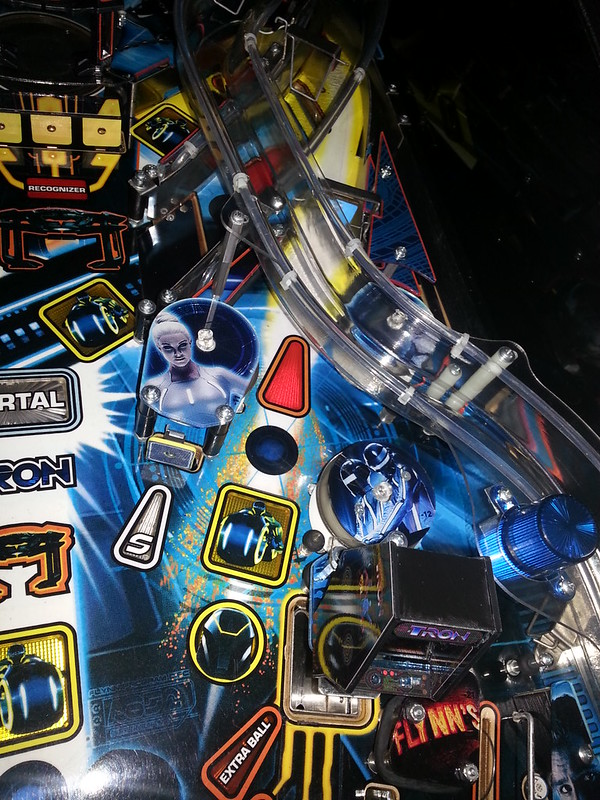
Before
After
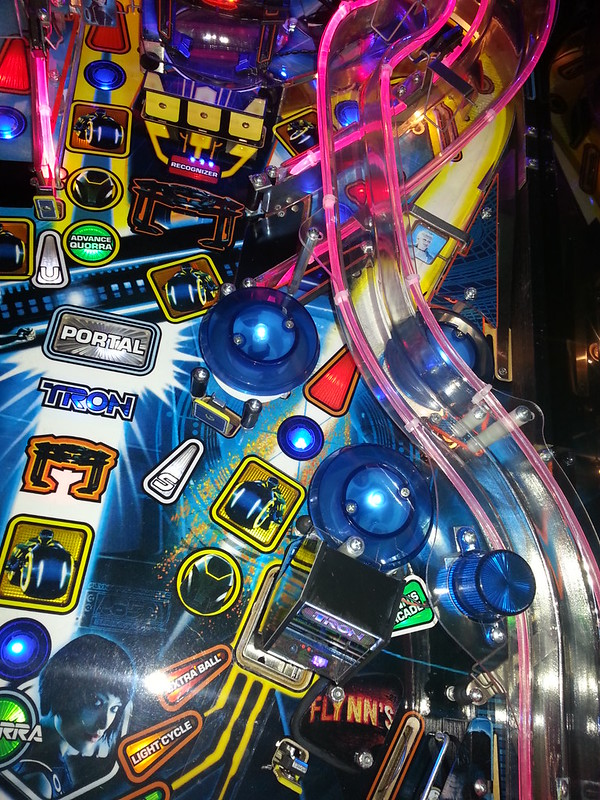
No hacks or modifications had to be done to install these pop bumper caps and the only thing you had to do was remove two smaller black spacers and get a smaller machine screw for the posts behind the "S" stand up target. I have another idea to use for pop bumper caps and might change these up in a few weeks in another tutorial.
I also forgot I have a set of Kims Pinballs sound activated EL wires which came on my Tron when I got it which have now been replaced by Eli's Fiber Optic Wire Kit earlier this year.
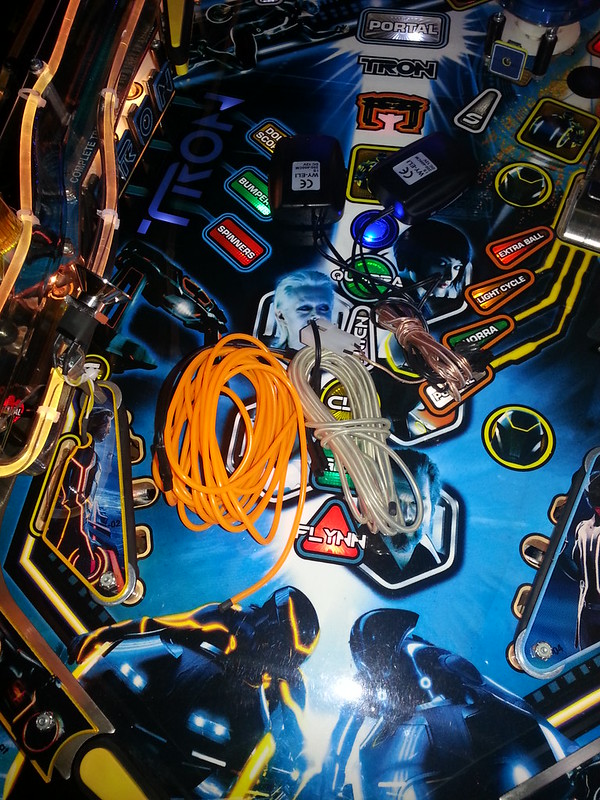
I did not experience any phantom switch hits when they were running in my game and you can adjust the sensitivity of each string.
If you are interested in this for your Tron or another game or for your Toyota MR2, $50 and it's yours
As usual any questions feel free to ask here or shoot me a PM
Enjoy!
-Mike
Anyways, I'm going to show you how to install the now after market Stern Playfield Support rails. They can be purchased from Pinball Life for $54.95 and comes with all the hardware required to do the installation along with instructions. I was not so fortunate and got the rails only and the additional hardware was missing which is not a big deal as you will see shortly.
http://www.pinballlife.com/index.php?p=product&id=1956
What you will want to do first is remove the lockdown bar, playfield glass and pinballs. Next you will use your nut driver and remove your instruction cards to expose the two nuts that are holding the apron down.
At this point you will want to pull your playfield forward and rest the pegs just on top of what would have been your lockbar receiver mechanism. To remove these pegs you will need to use a socket on top and an adjustable wrench below otherwise it will not work.
The reason you want to remove these pegs is because you no longer need them and it will get in the way to make use of this hole to secure the playfield support slide brackets.
I removed the big nut from the pegs from the top on both sides and slowly started to lift my playfield into the upright position. I was holding onto the sides of the playfield and removed the pegs from the bottom at the same time. Once in the upright position I started to position the slide brackets so that the top hole is aligned with the factory whole on the top.
I had to dig around my parts stash and find something I could use to mount these slide brackets from the bottom side of the playfield. Be careful what length screws you use because if they are too long you will have an unpleasant surprise when you lower your playfield later.
Pick your mounting points so that it is far away from light sockets, coils, inserts, etc. Here are the points I used on my game:
Now I careful lower the playfield and rest the slide brackets on the cab and now I install the last screw, washer and nut through the existing holes under the apron. These work but are a bit longer then I would like but not much I could do since it is almost 1:00am besides they are out of sight once the apron is on anyways.
That is pretty much it and make sure I tighten all the hardware one last time before I re-install the apron and here is what it looks like inside the game after 15 minutes
I may or may not put in a proper lockdown bar and receiver if I happen to come across one cheap otherwise I don't mind the one that came in my Tron Pro. I don't bother using the hasps for the lockdown bar and works out nicely because if I ever get a stuck ball or LED bulb falls out I can get access without grabbing the keys to my coin door.
While I was working on Tron, I order these Blue pop bumper caps in my last Marco order and never liked the way the stock ones looked.
I was going to order the cool looking pinbits ones but saw someone put these in their Tron and didn't look too bad and a hell of a lot cheaper too!
Before
After
No hacks or modifications had to be done to install these pop bumper caps and the only thing you had to do was remove two smaller black spacers and get a smaller machine screw for the posts behind the "S" stand up target. I have another idea to use for pop bumper caps and might change these up in a few weeks in another tutorial.
I also forgot I have a set of Kims Pinballs sound activated EL wires which came on my Tron when I got it which have now been replaced by Eli's Fiber Optic Wire Kit earlier this year.
I did not experience any phantom switch hits when they were running in my game and you can adjust the sensitivity of each string.
If you are interested in this for your Tron or another game or for your Toyota MR2, $50 and it's yours
As usual any questions feel free to ask here or shoot me a PM
Enjoy!
-Mike